Introduction
The Members & Permissions feature in Returndotai Returns enables store and merchant admins to delegate order-management responsibilities to designated staff members—without compromising security or visibility. By leveraging role-based access, you can ensure each team member has the exact level of authority they need to execute returns and exchanges, export order data, and update inventory statuses.
Access this feature
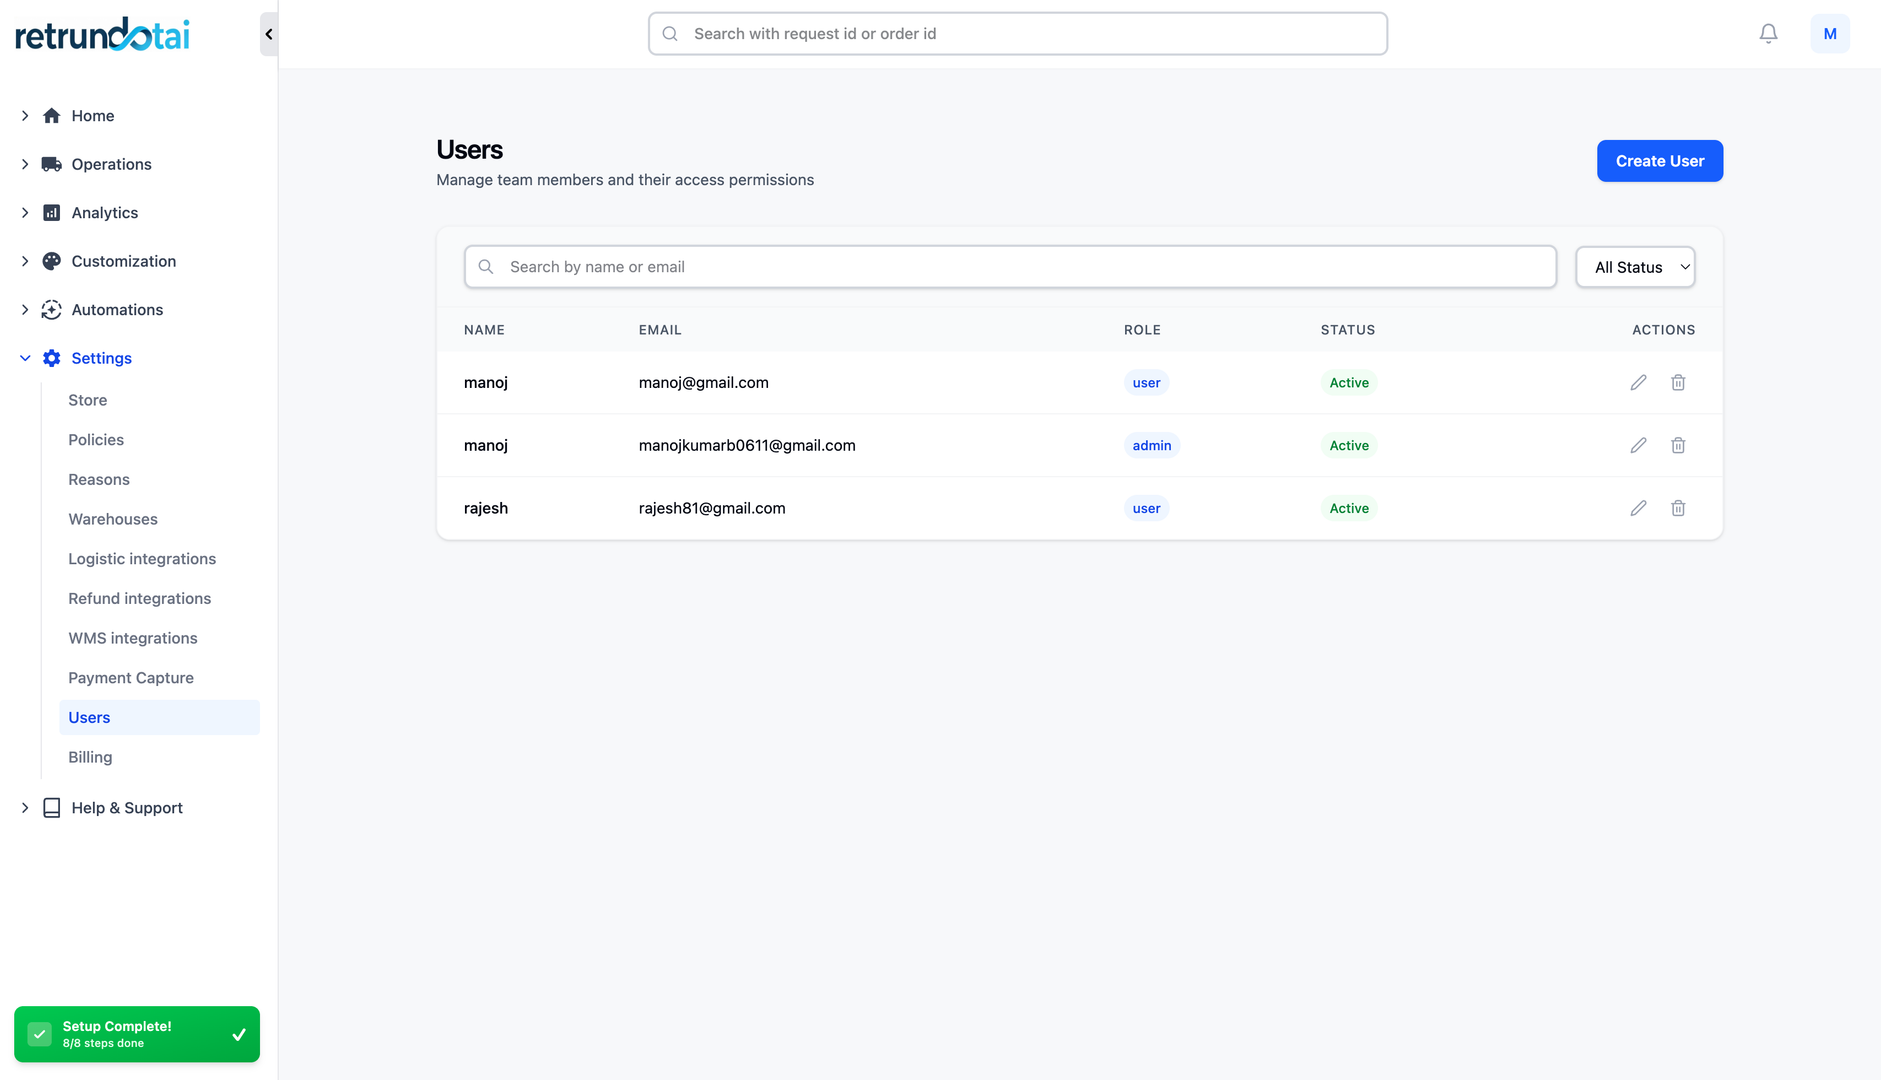
Navigate to /settings/users in your application.
Introduction
What is Members & Permissions?
A powerful team management feature that allows you to add staff members and control their access to return management functions.
- Delegate order-management responsibilities safely
- Role-based access control for staff members
- Maintain security and visibility
- Each team member has exact level of authority needed
- Execute returns and exchanges
- Export order data
- Update inventory statuses
Key Benefits
Why use Members & Permissions:
- Scale support operations efficiently
- Maintain data integrity and security
- Accelerate time-to-value for new staff
- Ensure compliance with access policies
- Empower staff to deliver exceptional post-sales experiences
- Reduce admin workload through delegation
Merchant Setup
Step 1: Add a New Member
Begin by adding a team member to your Returndotai Returns account:
- 1Go to Settings > Members & Permissions in the Returndotai Returns admin console
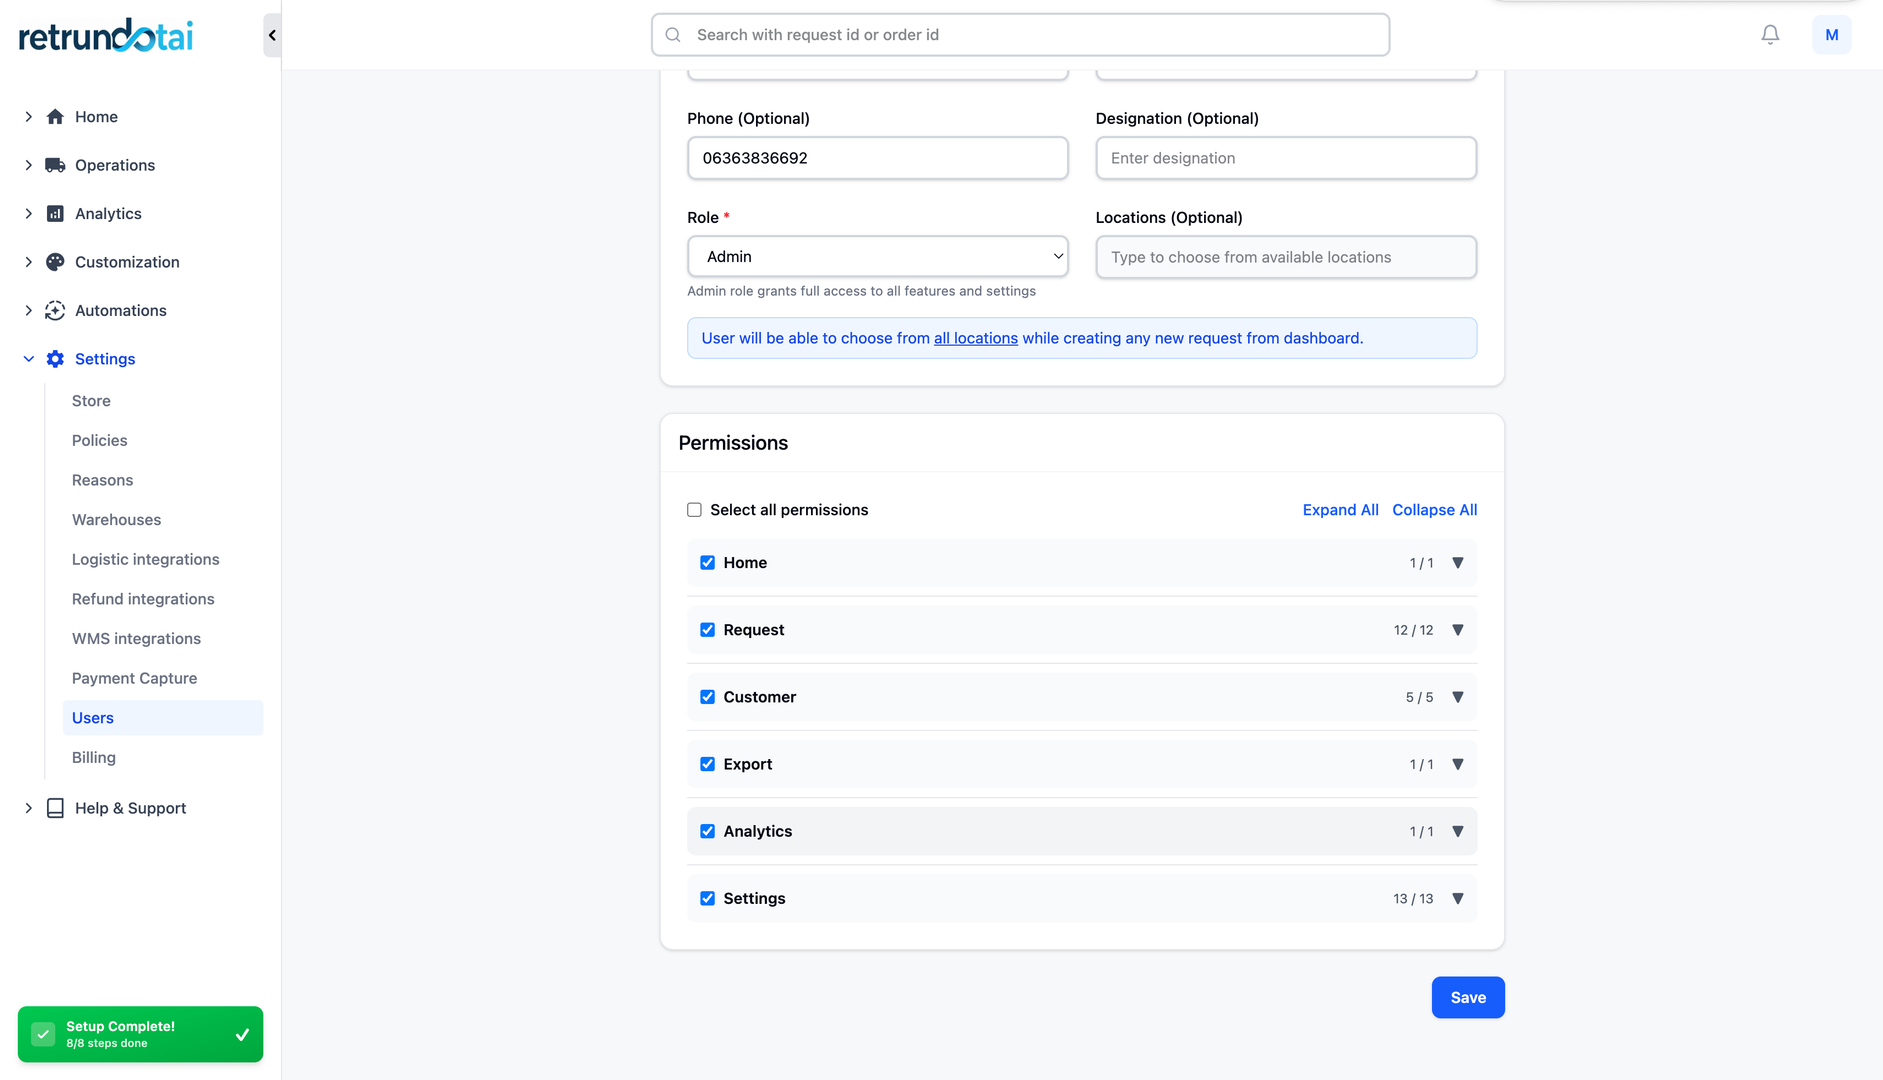
- 2Click "Add Member" to open the user-creation panel
- 3User creation form will appear
Step 2: Set Up Staff Credentials
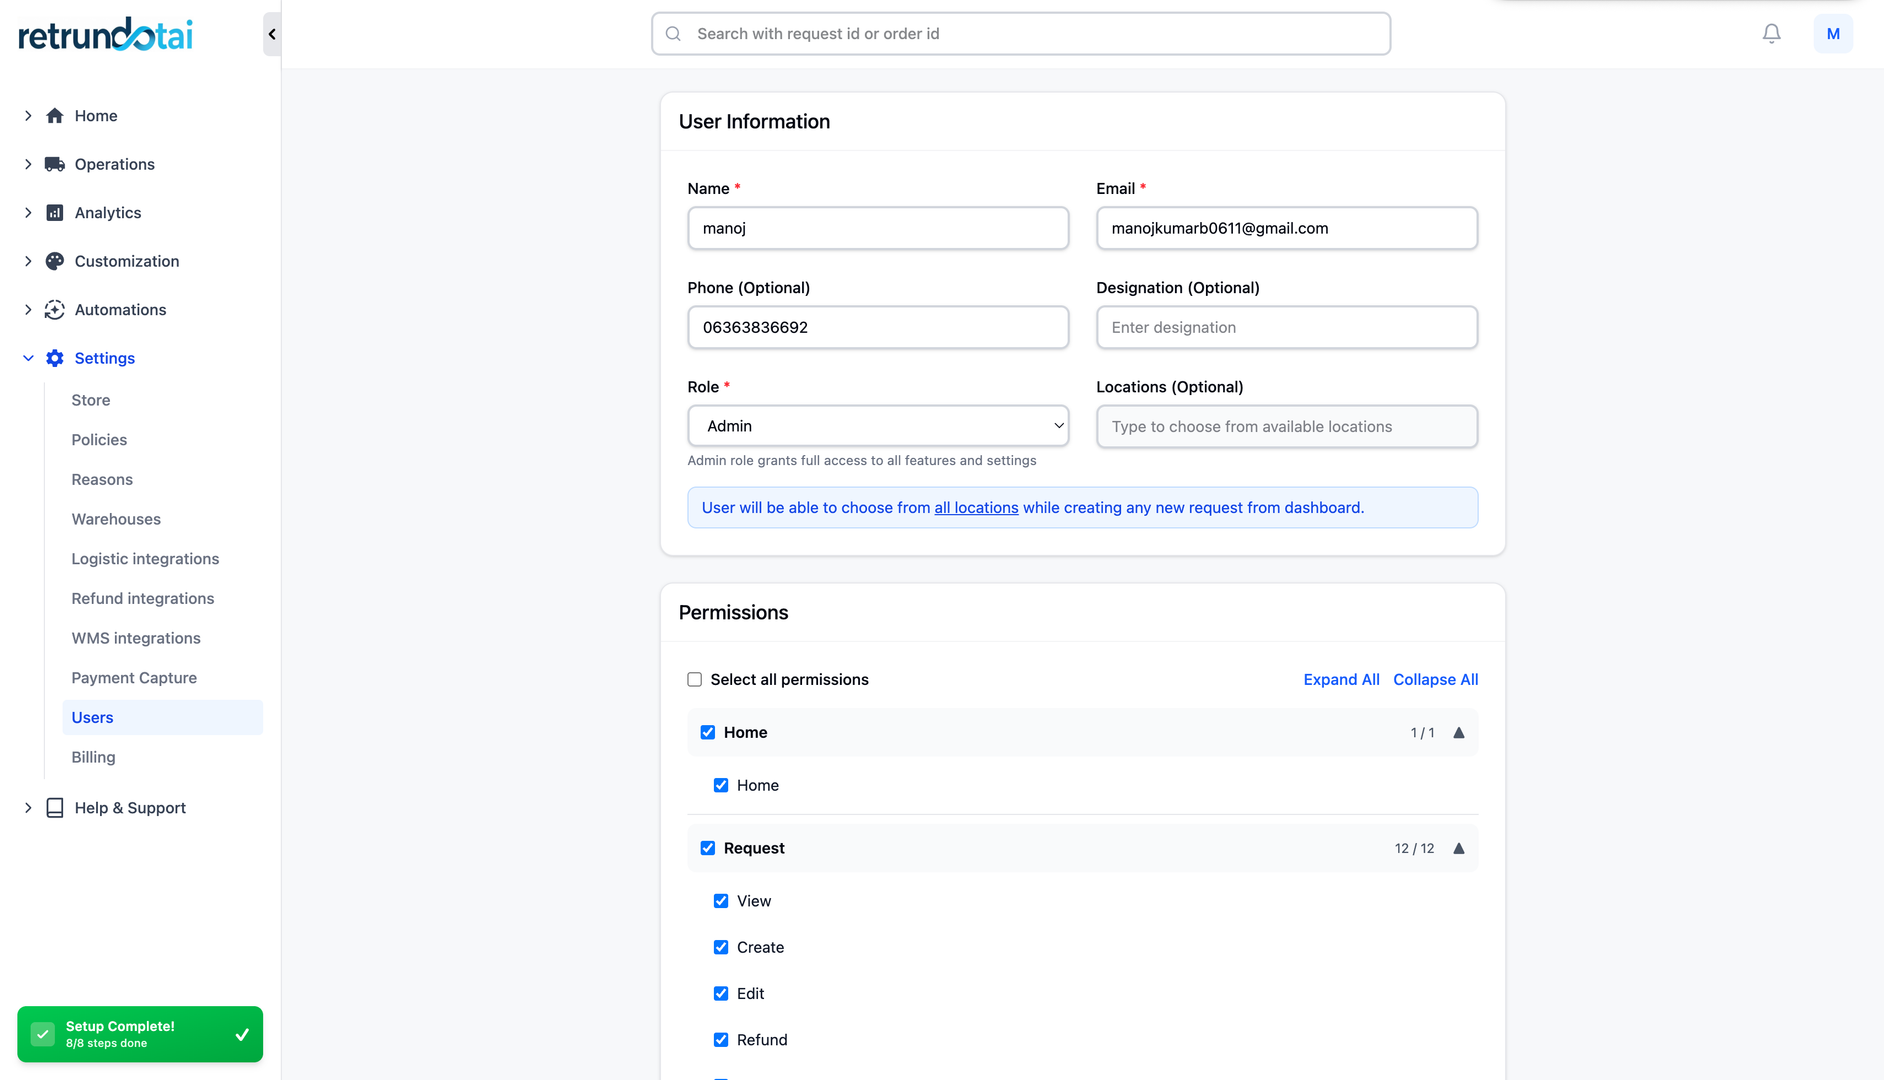
Enter the staff member's information:
- Name: Enter the name of the staff member
- Use their full name for clarity
- This will appear in activity logs
- Email: Provide their corporate email for login and notifications
- Must be a valid email address
- Used for account activation and notifications
- Should be their work email
- Password: Assign a secure, temporary password
- Let the system generate one for security
- Or create a strong password manually
- Staff can change it after first login
- Enables immediate access upon activation
Step 3: Trigger Account Activation
After saving, the system will automatically handle account activation:
- 1Send an email invitation with a secure login link
- 2Email sent to address provided in Step 2
- 3Contains secure, one-time activation link
- 4Includes login credentials
- 5Staff member clicks "Login now" to access the return management
- 6Redirected to Returndotai Returns login page
- 7Enter provided credentials
- 8Prompted to change password (recommended)
- 9Access granted to return management workspace
Step 4: Delegate Order Management Tasks
On first login, staff members access a focused Return & Exchange Management workspace featuring:
- Order Status Dashboard:
- Live insights into pending, in-progress, and completed returns
- Real-time updates on return statuses
- Filter and search capabilities
- Summary statistics and metrics
- Export CSV:
- One-click data extract for downstream reporting
- ERP integration support
- Customizable export fields
- Date range selection for exports
Step 5: Execute Core Return Workflows
Authorized staff can perform key return management tasks:
Mark as Received
Confirm receipt of returned items and update warehouse logs:
- 1Select return request from dashboard
- 2Review items being returned
- 3Verify physical receipt of items
- 4Click "Mark as Received" button
- 5Add any notes about condition upon receipt
- 6System updates status and logs timestamp
- 7Customer receives notification of receipt
Mark as Restocked
Classify SKU condition, log arrival date, and append comments:
- 1After marking as received, proceed to restock
- 2Classify SKU condition:
- 3Resellable: Item in good condition, can be resold
- 4Non-Resellable: Item damaged or unsuitable for resale
- 5Log Arrival Date:
- 6Date item arrived at warehouse
- 7Auto-filled or manually adjusted
- 8Append Comments:
- 9QC findings and inspection notes
- 10Damage notes or defects observed
- 11Restocking instructions
- 12Any relevant observations
- 13Submit to update inventory and complete process
Staff Member Workspace
Workspace Overview
What staff members see when they log in:
- Focused, streamlined interface
- Only return/exchange management functions
- No access to store settings or billing
- Clear navigation and intuitive layout
- Real-time data updates
- Mobile-responsive design
Dashboard Features
Key features available to staff members:
- Return request list with filters
- Search by order number, customer name, or email
- Sort by date, status, or priority
- Quick actions for common tasks
- Status indicators and progress tracking
- Activity log for audit trail
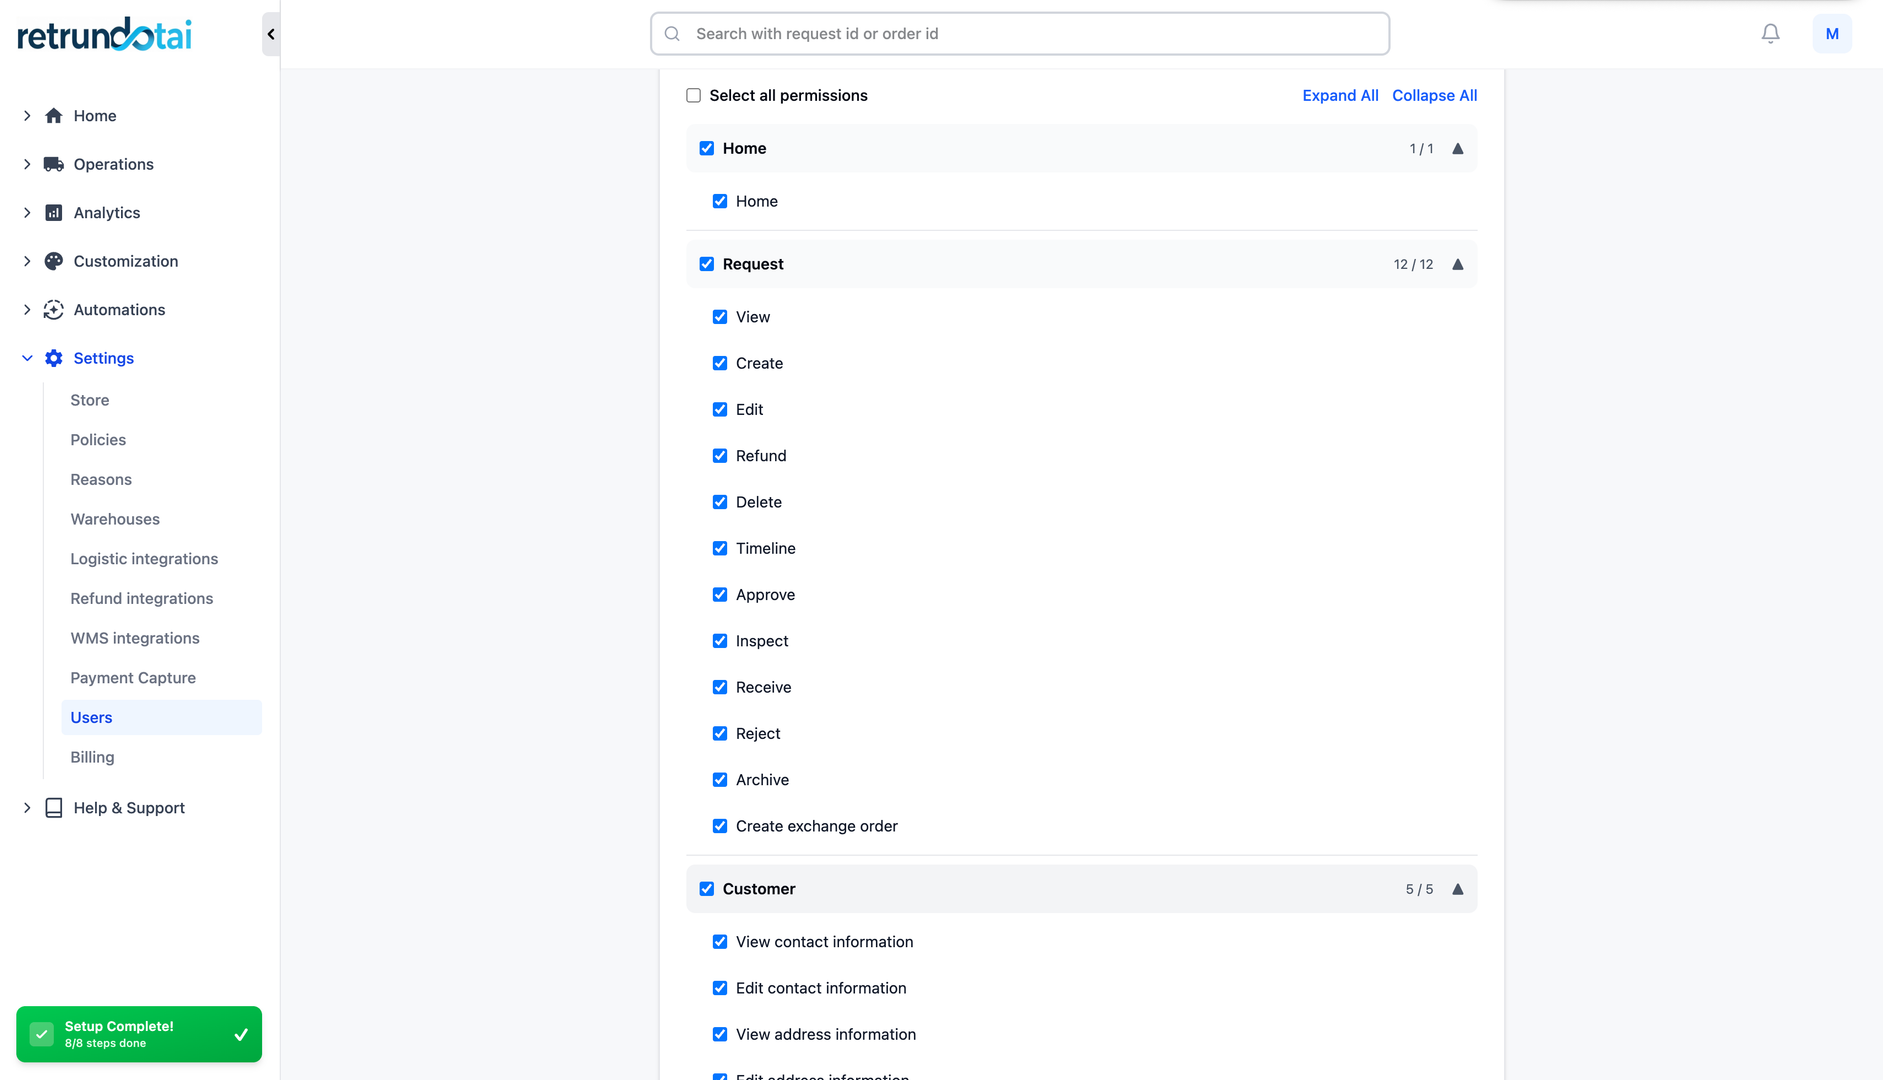
Permission Limitations
What staff members cannot access:
- Store settings and configuration
- Billing and subscription management
- Adding or removing other members
- Changing return policies
- Modifying workflows or automation
- Accessing financial reports
- Integration settings
Managing Members
View All Members
See your complete team:
- 1Go to Settings > Members & Permissions
- 2View list of all team members
- 3See member name, email, and status
- 4Check last login date
- 5View role assignments
Edit Member Details
Update staff member information:
- 1Click on member name in list
- 2Edit name or email if needed
- 3Reset password if requested
- 4Update permissions if roles change
- 5Save changes
Remove a Member
Revoke access when staff leaves or changes roles:
- 1Go to Members & Permissions list
- 2Find the member to remove
- 3Click "Remove" or "Delete" button
- 4Confirm removal
- 5Member loses access immediately
- 6All their activity remains logged for audit
Best Practices
Security Best Practices
Keep your team and data secure:
- Use strong passwords for all accounts
- Require staff to change temporary passwords on first login
- Use work email addresses only
- Remove access immediately when staff leaves
- Regularly audit active members
- Monitor activity logs for unusual behavior
- Don't share login credentials
Staff Onboarding
Set your team up for success:
- 1Create comprehensive training documentation
- 2Provide guided tour of staff workspace
- 3Explain key workflows and processes
- 4Set clear expectations for response times
- 5Establish escalation procedures
- 6Schedule regular check-ins initially
- 7Provide contact for questions and support
Monitor Activity
Track team performance and identify issues:
- Review activity logs regularly
- Track return processing times
- Monitor staff workload distribution
- Identify training opportunities
- Recognize high performers
- Address issues promptly
- Use data to optimize processes
Troubleshooting
Common Issues and Solutions
Resolve member access problems:
Issue: Activation Email Not Received
If staff member doesn't receive activation email:
- 1Check spam/junk folder
- 2Verify email address was entered correctly
- 3Wait 10-15 minutes for email delivery
- 4Resend invitation from admin panel
- 5Try alternative email address if persistent
- 6Contact support if issue continues
Issue: Staff Cannot Login
If staff member cannot access their account:
- 1Verify they're using correct email address
- 2Check password is entered correctly
- 3Try password reset if forgotten
- 4Ensure account was activated via email link
- 5Verify member hasn't been removed from system
- 6Check for any browser or cache issues
- 7Clear browser cache and try again
Issue: Staff Member Missing Features
If expected features aren't available:
- 1Verify staff member is logged in (not admin)
- 2Check permissions are set correctly
- 3Refresh browser page
- 4Clear cache and cookies
- 5Verify feature is available in your plan
- 6Contact admin to verify permission settings
Key Features
Role-Based Access
Staff members get focused workspace with only return management functions
Quick Onboarding
Automatic email invitations with secure login links for fast team member setup
Core Workflows
Staff can mark items as received and restocked with detailed condition tracking
Data Export
One-click CSV export for reporting and ERP integration
Activity Tracking
All staff actions logged for audit trail and accountability
Secure Access
Controlled permissions ensure data security and integrity
Important Notes
Use Work Email Addresses
Always use corporate/work email addresses for staff accounts, not personal emails. This ensures continuity when employees leave and makes it easier to manage access.
Change Temporary Passwords
Require staff to change their temporary password immediately upon first login for security. Use strong passwords with mix of letters, numbers, and symbols.
Regular Access Audits
Review your team members list monthly to ensure only active staff have access. Remove accounts for departed employees immediately.
Check Spam for Activation Emails
Activation emails sometimes land in spam folders. Tell new staff members to check spam if they don't receive the activation email within 10 minutes.
Document Your Processes
Create standard operating procedures for common tasks like marking items received or restocked. This ensures consistency across all team members.
Start with Small Team
Begin by adding 1-2 staff members and refining your processes before scaling up. This helps identify any workflow issues early.
Monitor Activity Logs
Regularly review activity logs to ensure proper use of the system and identify any training needs or process improvements.
Set Clear Expectations
Define clear response time goals for staff (e.g., mark as received within 24 hours) and communicate escalation procedures for complex cases.
Don't Share Credentials
Never share login credentials between team members. Each person should have their own account for accountability and security.
Provide Training
Invest time in properly training new team members on the workspace, workflows, and your specific procedures. This reduces errors and improves efficiency.