Introduction
Users and authorized staff can now add comments directly to the timeline of a return/exchange request. This feature helps track requests with more context by manually confirming and documenting important details throughout the request lifecycle. All comments are stored chronologically in the timeline, creating a complete audit trail of communications and decisions.
Access this feature
Navigate to /returns in your application.
Overview
What is Comment Block in Timeline?
The Comment Block feature allows merchants and staff members to add notes, observations, and documentation directly to the request timeline. Each comment is timestamped and attributed to the user who created it, providing a complete history of all interactions and decisions related to a return or exchange request.
- 1Comments appear chronologically in the request timeline
- 2Each comment shows the author and timestamp
- 3Staff can add context, notes, and important information
- 4All team members can view the comment history
- 5Comments remain permanently as part of the request record
- 6Helps maintain continuity when multiple staff handle the same request
Supported Comment Types
The Comment Block currently supports multiple types of content, with additional formats coming soon.
- ✍️ Text - Fully supported (available now)
- 🖼️ Image - Coming soon
- 📎 Attached file - Coming soon
Benefits
Better Collaboration Between Staff and Users
Comments enable seamless collaboration across your team, ensuring everyone has access to the same information and context.
- Multiple staff members can contribute to the same request
- New team members can quickly understand request history
- Customer service can document customer conversations
- Managers can provide guidance and approvals
- Warehouse team can note condition of returned items
- Accounting can document refund processing details
More Transparent Communication for Each Request
Every action, decision, and communication is documented in a single, chronological timeline, making it easy to understand what happened and when.
- Clear record of all decisions made
- Documented reasoning for exceptions or special handling
- Customer requests and merchant responses tracked
- Internal discussions visible to authorized staff
- Quality control observations documented
- Dispute resolution history maintained
Improved Traceability with All Notes, Images, and Files Stored in One Place
All documentation related to a request is centralized in the timeline, eliminating the need to search through emails, notes, or separate systems.
- Complete audit trail for compliance and quality control
- Easy reference for similar cases in the future
- Documentation for dispute resolution
- Training material for new staff members
- Performance tracking and quality metrics
- Historical data for policy improvement
How to Use
Step 1: Open the Request Timeline
Navigate to the return or exchange request where you want to add a comment.
- 1Go to the Management section in Returndotai dashboard
- 2Locate the return or exchange request you want to comment on
- 3Click on the request to open the details page
- 4Scroll to the "Request Timeline" section
- 5The timeline shows all events in chronological order
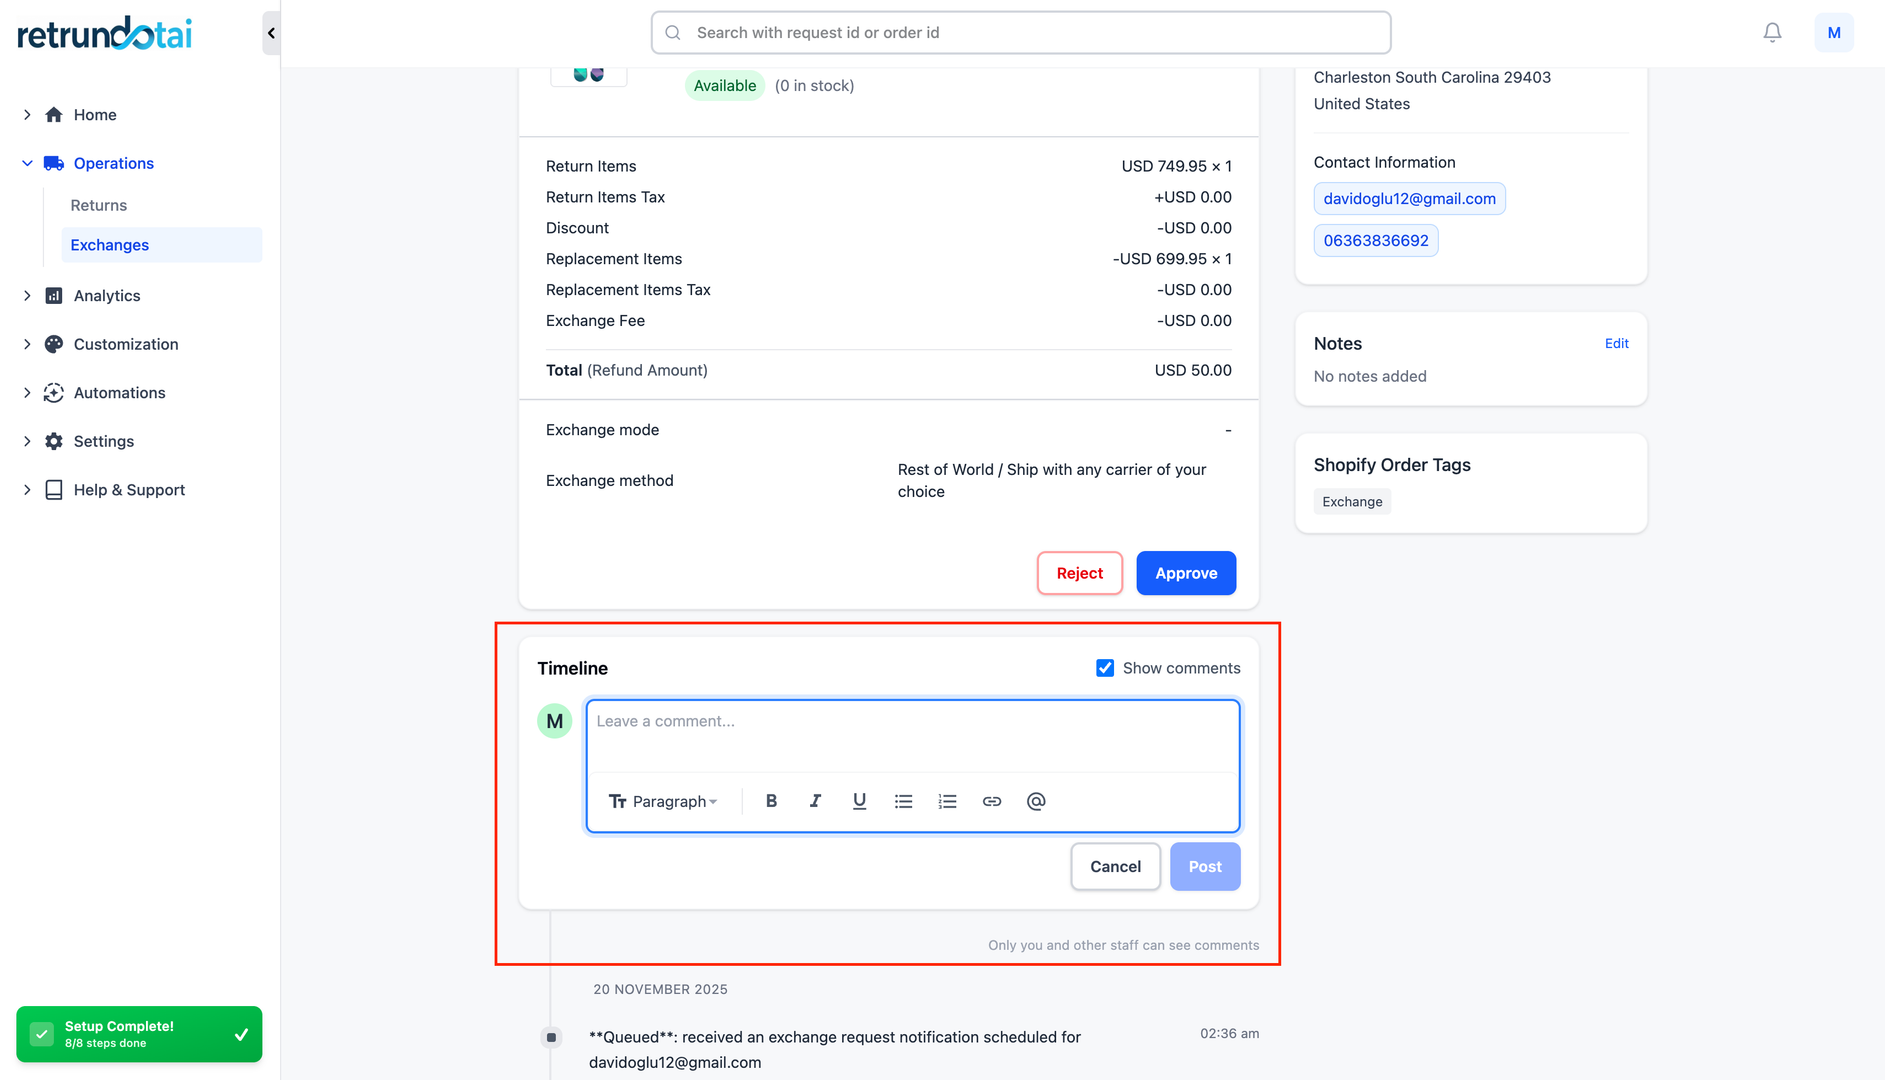
Step 2: Click "Add Comment"
Initiate the comment creation process by clicking the "Add Comment" button.
- 1Look for the "Add Comment" button in the timeline section
- 2Click the button to open the comment input interface
- 3A comment form or text area will appear
- 4The interface is ready for you to enter your comment
Step 3: Enter Text, Upload Image, or Attach File
Add your comment content using one or more of the available input methods.
- 1Enter text in the comment field:
- 2Type your note, observation, or message
- 3Use clear, professional language
- 4Include relevant details and context
- 5Tag specific items or issues if applicable
- 6Upload an image (Coming soon):
- 7Click the image upload button
- 8Select image from your device
- 9Preview the image before saving
- 10Attach a file (Coming soon):
- 11Click the file attachment button
- 12Select file from your device
- 13Supported formats will be listed

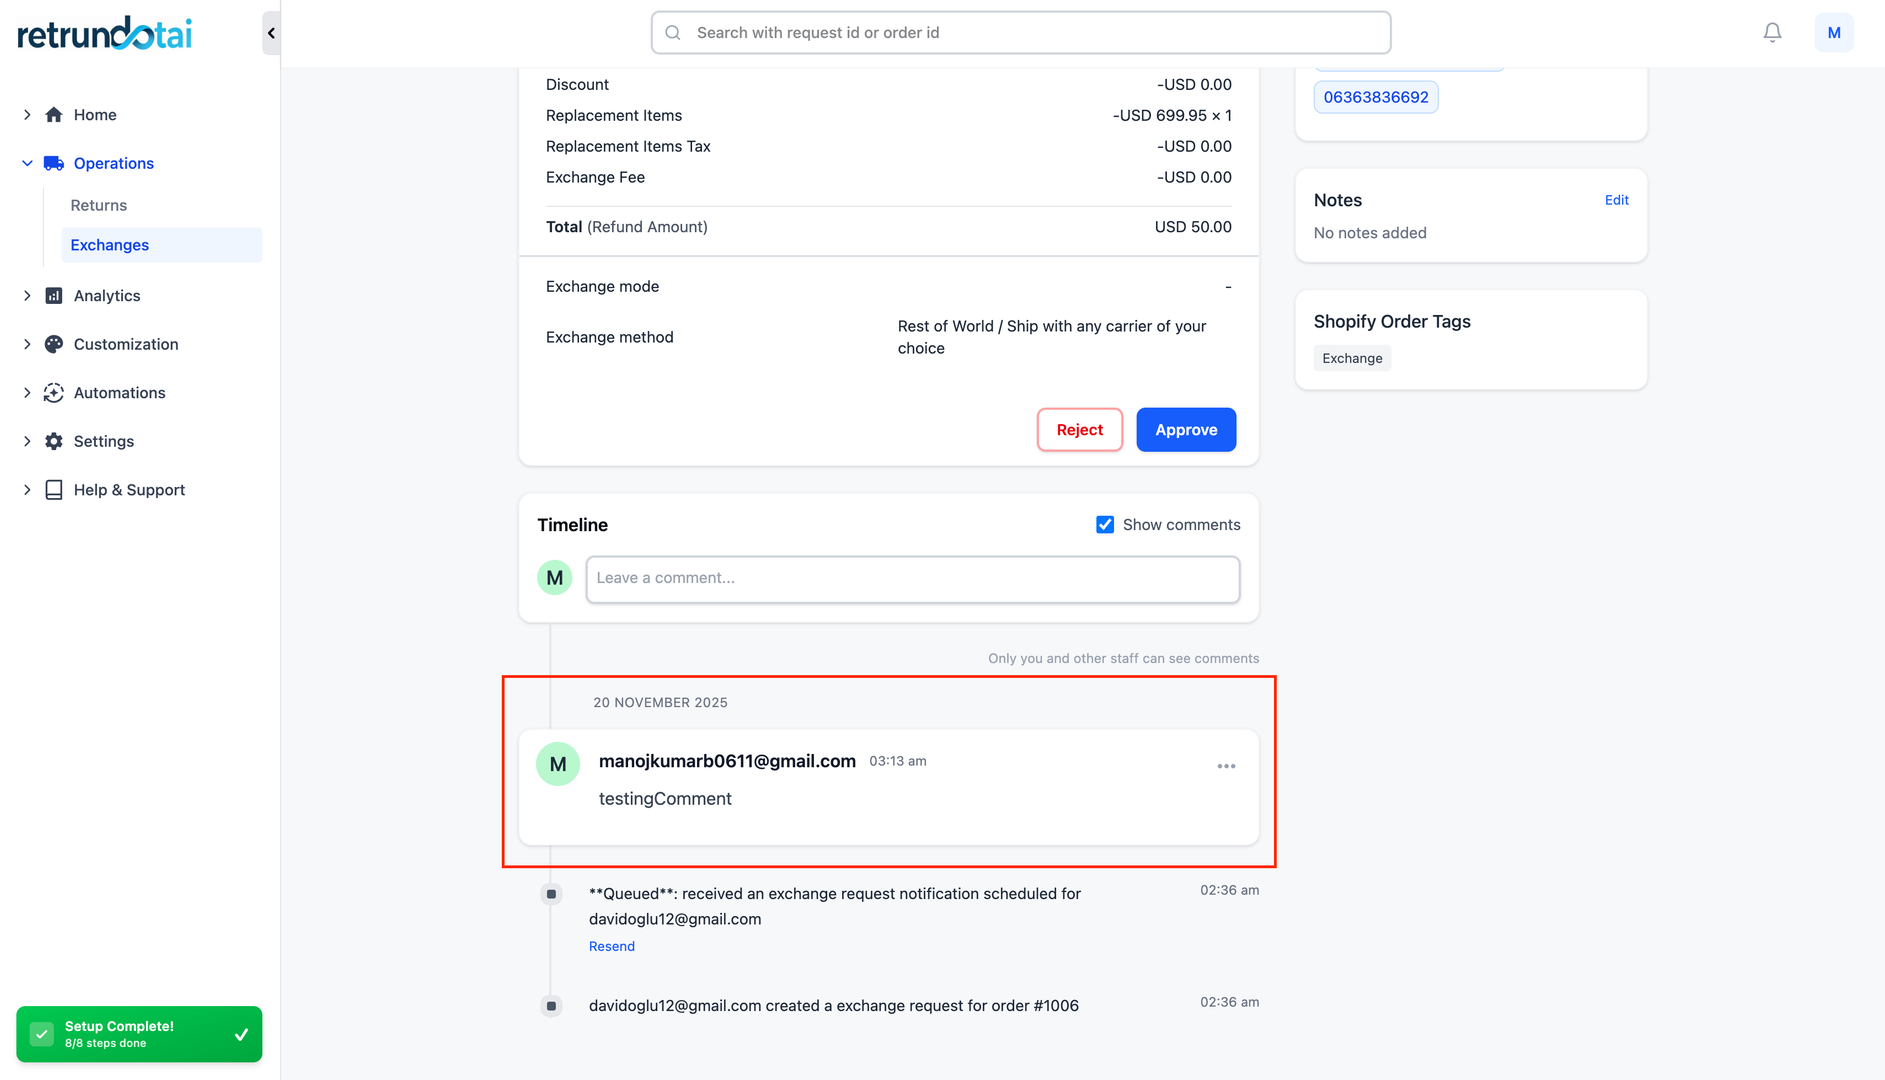
Step 4: Save to Update the Timeline
Save your comment to add it to the request timeline permanently.
- 1Review your comment for accuracy and clarity
- 2Click the "Save" or "Add Comment" button
- 3The comment is added to the timeline immediately
- 4You'll see your comment appear with:
- 5Your name as the author
- 6Current timestamp
- 7The comment content
- 8All authorized staff can now view the comment
- 9The comment is permanently part of the request record
Common Use Cases
Documenting Customer Communication
Record phone calls, emails, and chat conversations directly in the timeline for complete context.
- 1After a phone call with the customer:
- 2Add comment summarizing the conversation
- 3Note customer requests or concerns
- 4Document promises or commitments made
- 5Include customer preference or special instructions
- 6When receiving customer emails:
- 7Copy key information into a timeline comment
- 8Reference the email date and subject
- 9Note any follow-up actions required
- 10For live chat interactions:
- 11Summarize important points discussed
- 12Document resolution or next steps agreed upon
Internal Staff Notes and Collaboration
Share observations, questions, and guidance between team members working on the same request.
- 1Customer service to warehouse:
- 2"Customer mentioned item was damaged in transit - please inspect carefully"
- 3"Rush processing needed - customer leaving for vacation"
- 4Manager to staff:
- 5"Approved exception for this loyal customer"
- 6"Please process refund as store credit per our policy"
- 7Staff to staff:
- 8"Spoke with customer - they prefer exchange over refund"
- 9"Waiting for customer to ship item back"
Quality Control and Inspection Notes
Document the condition of returned items and quality control observations.
- 1Warehouse inspection findings:
- 2"Item received in original packaging, unused"
- 3"Visible wear on product - appears to have been used"
- 4"Tags removed but item is in new condition"
- 5Quality issues noted:
- 6"Confirmed manufacturing defect on seam"
- 7"Color discrepancy matches customer photo"
- 8Restocking decisions:
- 9"Item approved for resale"
- 10"Item marked as damaged - not suitable for resale"
Documenting Exceptions and Special Cases
Maintain a clear record of why exceptions were made and who authorized them.
- 1Policy exceptions:
- 2"Approved late return due to customer hospitalization (Manager: John)"
- 3"Waived restocking fee for VIP customer"
- 4Special handling:
- 5"Customer damaged item - issued goodwill refund for retention"
- 6"Accepted return without receipt based on purchase history"
- 7Dispute resolutions:
- 8"Escalated to management - resolved with partial refund"
- 9"Customer accepted store credit instead of refund"
Tracking External Actions and Status Updates
Document actions taken outside the system or status changes not automatically captured.
- 1Shipping and logistics:
- 2"Customer confirmed they dropped off return package today"
- 3"Package delivered per tracking - awaiting warehouse processing"
- 4Payment processing:
- 5"Refund manually processed in Shopify - see order #12345"
- 6"Contacted payment processor to expedite refund"
- 7Third-party coordination:
- 8"Contacted manufacturer for warranty claim"
- 9"Shipping label sent via email per customer request"
Best Practices
Writing Effective Comments
Be clear and concise - Get to the point while including necessary details
- Use professional language - Comments may be referenced in disputes
- Include dates and times when relevant - "Customer called at 2 PM EST"
- Tag or reference specific items when discussing multiple products
- Use consistent formatting - Makes comments easier to scan and read
- Avoid abbreviations that others might not understand
- State facts, not assumptions - "Item appears used" vs "Customer definitely used this"
When to Add Comments
After every customer interaction (phone, email, chat)
- When making decisions that deviate from standard policy
- When warehouse inspection reveals important information
- Before and after escalations to management
- When coordinating with other departments or external parties
- To document reasons for delays or extended processing times
- When customer provides additional information not captured elsewhere
- To provide context for future reference or similar cases
Privacy and Security Considerations
Never include sensitive personal information (full credit card numbers, SSN)
- Avoid including customer passwords or account credentials
- Be mindful that comments are visible to all authorized staff
- Use professional tone - comments are part of permanent record
- Don't include information that could violate customer privacy
- Follow your company's data protection and GDPR policies
- Consider that comments may be used in legal proceedings or disputes
Using Comments for Team Coordination
Tag team members by name when they need to take action
- Set clear expectations: "Warehouse: please inspect and report back by Friday"
- Acknowledge previous comments: "Per Sarah's note above, I've approved the refund"
- Close the loop: "Update: Customer confirmed receipt of refund"
- Use consistent keywords for easier searching (URGENT, APPROVED, DENIED)
- Document handoffs: "Passing to John in accounting for refund processing"
Viewing and Managing Comments
Understanding the Timeline View
Comments appear in the timeline alongside automatic system events, creating a complete chronological history.
- 1Timeline shows events in reverse chronological order (newest first)
- 2Each comment displays:
- 3Author name and role/department
- 4Date and time the comment was added
- 5The comment content (text, images, files)
- 6Edit indicator if comment was modified
- 7System events appear with automatic timestamps
- 8Comments are visually distinguished from automatic events
- 9All authorized staff can view comments
- 10Timeline can be filtered to show only comments (if available)
Editing and Deleting Comments
Depending on your permissions and settings, you may be able to edit or delete comments you've created.
- 1Check if your role allows comment editing
- 2Look for edit/delete icons next to your comments
- 3Click edit to modify the comment content
- 4Edited comments may show "Edited" indicator with timestamp
- 5Deleting comments (if allowed):
- 6May require manager approval
- 7Deleted comments might remain in audit logs
- 8Consider adding a new comment instead of deleting
- 9Some systems prevent deletion to maintain audit trail
Upcoming Features
🖼️ Image Support (Coming Soon)
Upload photos directly to timeline comments to provide visual documentation.
- Upload product condition photos
- Share screenshots of customer communications
- Document packaging or damage visually
- Attach proof of delivery or shipping labels
- Include photos from customer submissions
- Visual evidence for quality control and disputes
📎 File Attachments (Coming Soon)
Attach documents and files to provide supporting documentation.
- Attach PDFs of invoices or receipts
- Include warranty documentation
- Upload inspection reports or checklists
- Attach customer correspondence (emails, letters)
- Include shipping manifests or tracking documents
- Store compliance or quality control forms
Other Planned Enhancements
Additional features under consideration for future releases.
- @mentions to notify specific team members
- Comment templates for common scenarios
- Search and filter comments by keyword or author
- Export timeline with comments for reporting
- Comment notifications to relevant staff
- Rich text formatting (bold, italic, lists)
- Private comments visible only to specific roles
Troubleshooting
Common Issues and Solutions
Key points to understand:
- Cannot see "Add Comment" button: Check your user permissions and role
- Comment not saving: Verify you have internet connection and try again
- Cannot edit comment: You may only be able to edit your own comments
- Comment not appearing: Refresh the page to see the latest timeline
- Character limit reached: Comments may have a maximum length restriction
- Lost comment after error: Type longer comments in a text editor first, then paste
Permission Requirements
If you cannot add comments, check the following.
- 1Verify your user account has comment permissions enabled
- 2Check if your role allows timeline interaction
- 3Ensure you have access to the specific request (not restricted)
- 4Some organizations limit comments to certain departments or roles
- 5Contact your administrator to request comment permissions
- 6Manager approval may be required for comment editing/deletion
Key Features
Chronological Timeline
All comments appear in order with timestamps and author attribution
Text Comments
Fully supported text-based comments available now
Team Collaboration
Multiple staff members can contribute notes and observations
Complete Audit Trail
Permanent record of all communications and decisions
Coming Soon: Images
Upload photos and visual documentation to timeline
Coming Soon: File Attachments
Attach documents and supporting files to requests
Important Notes
Document Customer Interactions
Always add a comment after phone calls, emails, or chats with customers. Include key points discussed, promises made, and next steps agreed upon.
Professional Language Required
Comments are part of the permanent request record and may be referenced in disputes or audits. Always use professional, factual language.
Use Comments for Exceptions
When approving requests outside standard policy, document the reason and authorization in a timeline comment for future reference and compliance.
Protect Customer Privacy
Never include sensitive information like full credit card numbers, passwords, or personal identification numbers in comments. Follow data protection policies.
Clear Handoffs Between Teams
When passing a request to another department, use comments to provide context and specify what action is needed. Tag the responsible person or team if possible.
Comments Create Audit Trail
All comments contribute to a complete audit trail. This is valuable for compliance, quality control, training, and resolving disputes.
Related Articles
How to Customize Return Page URL by Shopify App Proxy
Set up custom URLs for your return portal using Shopify app proxy integration
Auto-sync with brand color
Automatically synchronize your store theme colors with the return portal
Support A Record (White-label domain)
Configure custom domains for your return portal using A record DNS settings
Embed return portal to the store page
Seamlessly integrate the return portal directly into your store pages