Introduction
We've made an important update to improve the buyer experience and streamline integration with your Shopify store. The Returns Portal has been moved into your Shopify App Proxy, meaning it now runs directly within your store's domain instead of an external website. This provides a seamless experience for customers and better SEO benefits.
Access this feature
Navigate to /customization/returnPreview in your application.
Overview
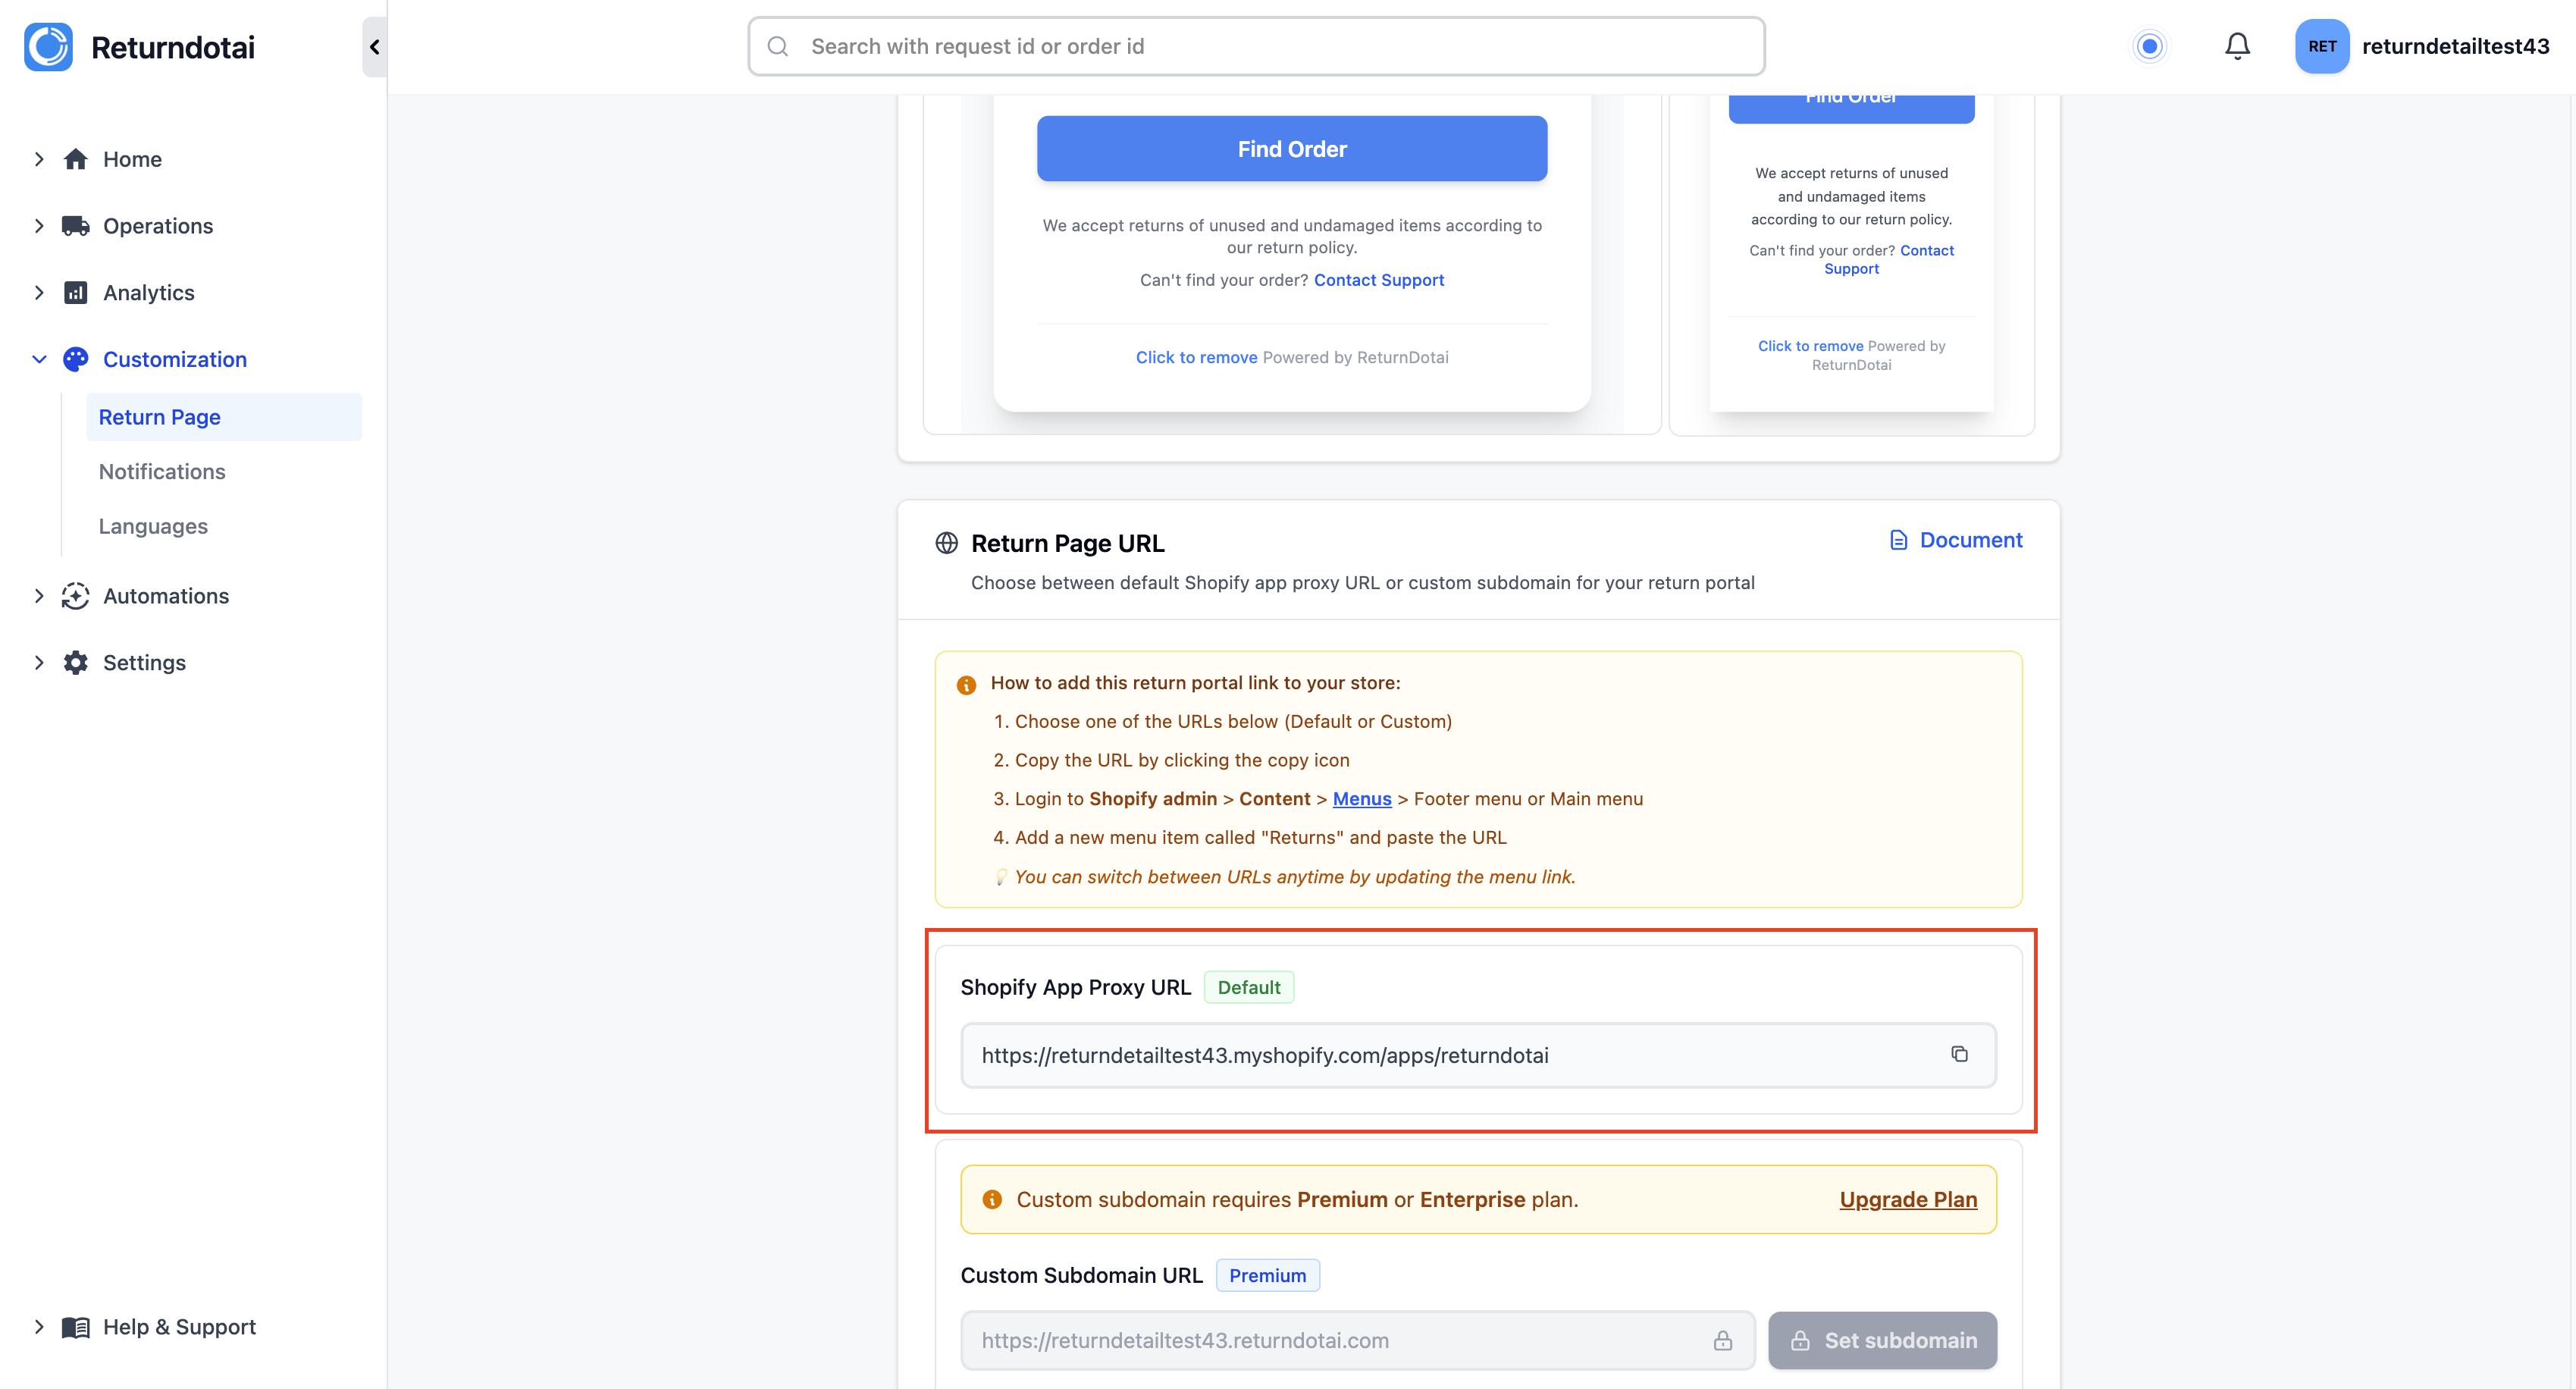
Important URL Change
The Returns Portal URL structure has changed to integrate seamlessly with your Shopify store.
- Old URL: https://yourstore.returnsdrive.com
- New URL: https://yourstore.com/apps/returns-portal
- The Returns Portal now runs directly within your store's domain
- No longer hosted on an external website
- Provides better customer experience and trust
- Improves SEO and brand consistency
Why This Change Matters
Moving the Returns Portal to your store's domain provides several important benefits for your business and customers.
- Customer Trust: Customers stay on your domain throughout the return process
- Brand Consistency: Return portal matches your store's branding and URL
- SEO Benefits: Content is indexed under your primary domain
- Security: Customers see your SSL certificate and domain
- Analytics: Better tracking in Google Analytics and other tools
- No External Redirects: Seamless experience without leaving your store
Understanding Primary and Secondary URLs
Returndotai currently provides two URL options for customers to access the returns portal. You must set one as Primary because notifications and return tracking status will only be sent to the Primary return page.
- 1Primary URL: The main URL used in all customer communications
- 2Secondary URL: Alternative access point (optional)
- 3Only the Primary URL receives:
- 4Email notification links
- 5Return tracking status updates
- 6Automated customer communications
- 7Choose wisely: The Primary URL should be your preferred customer-facing URL
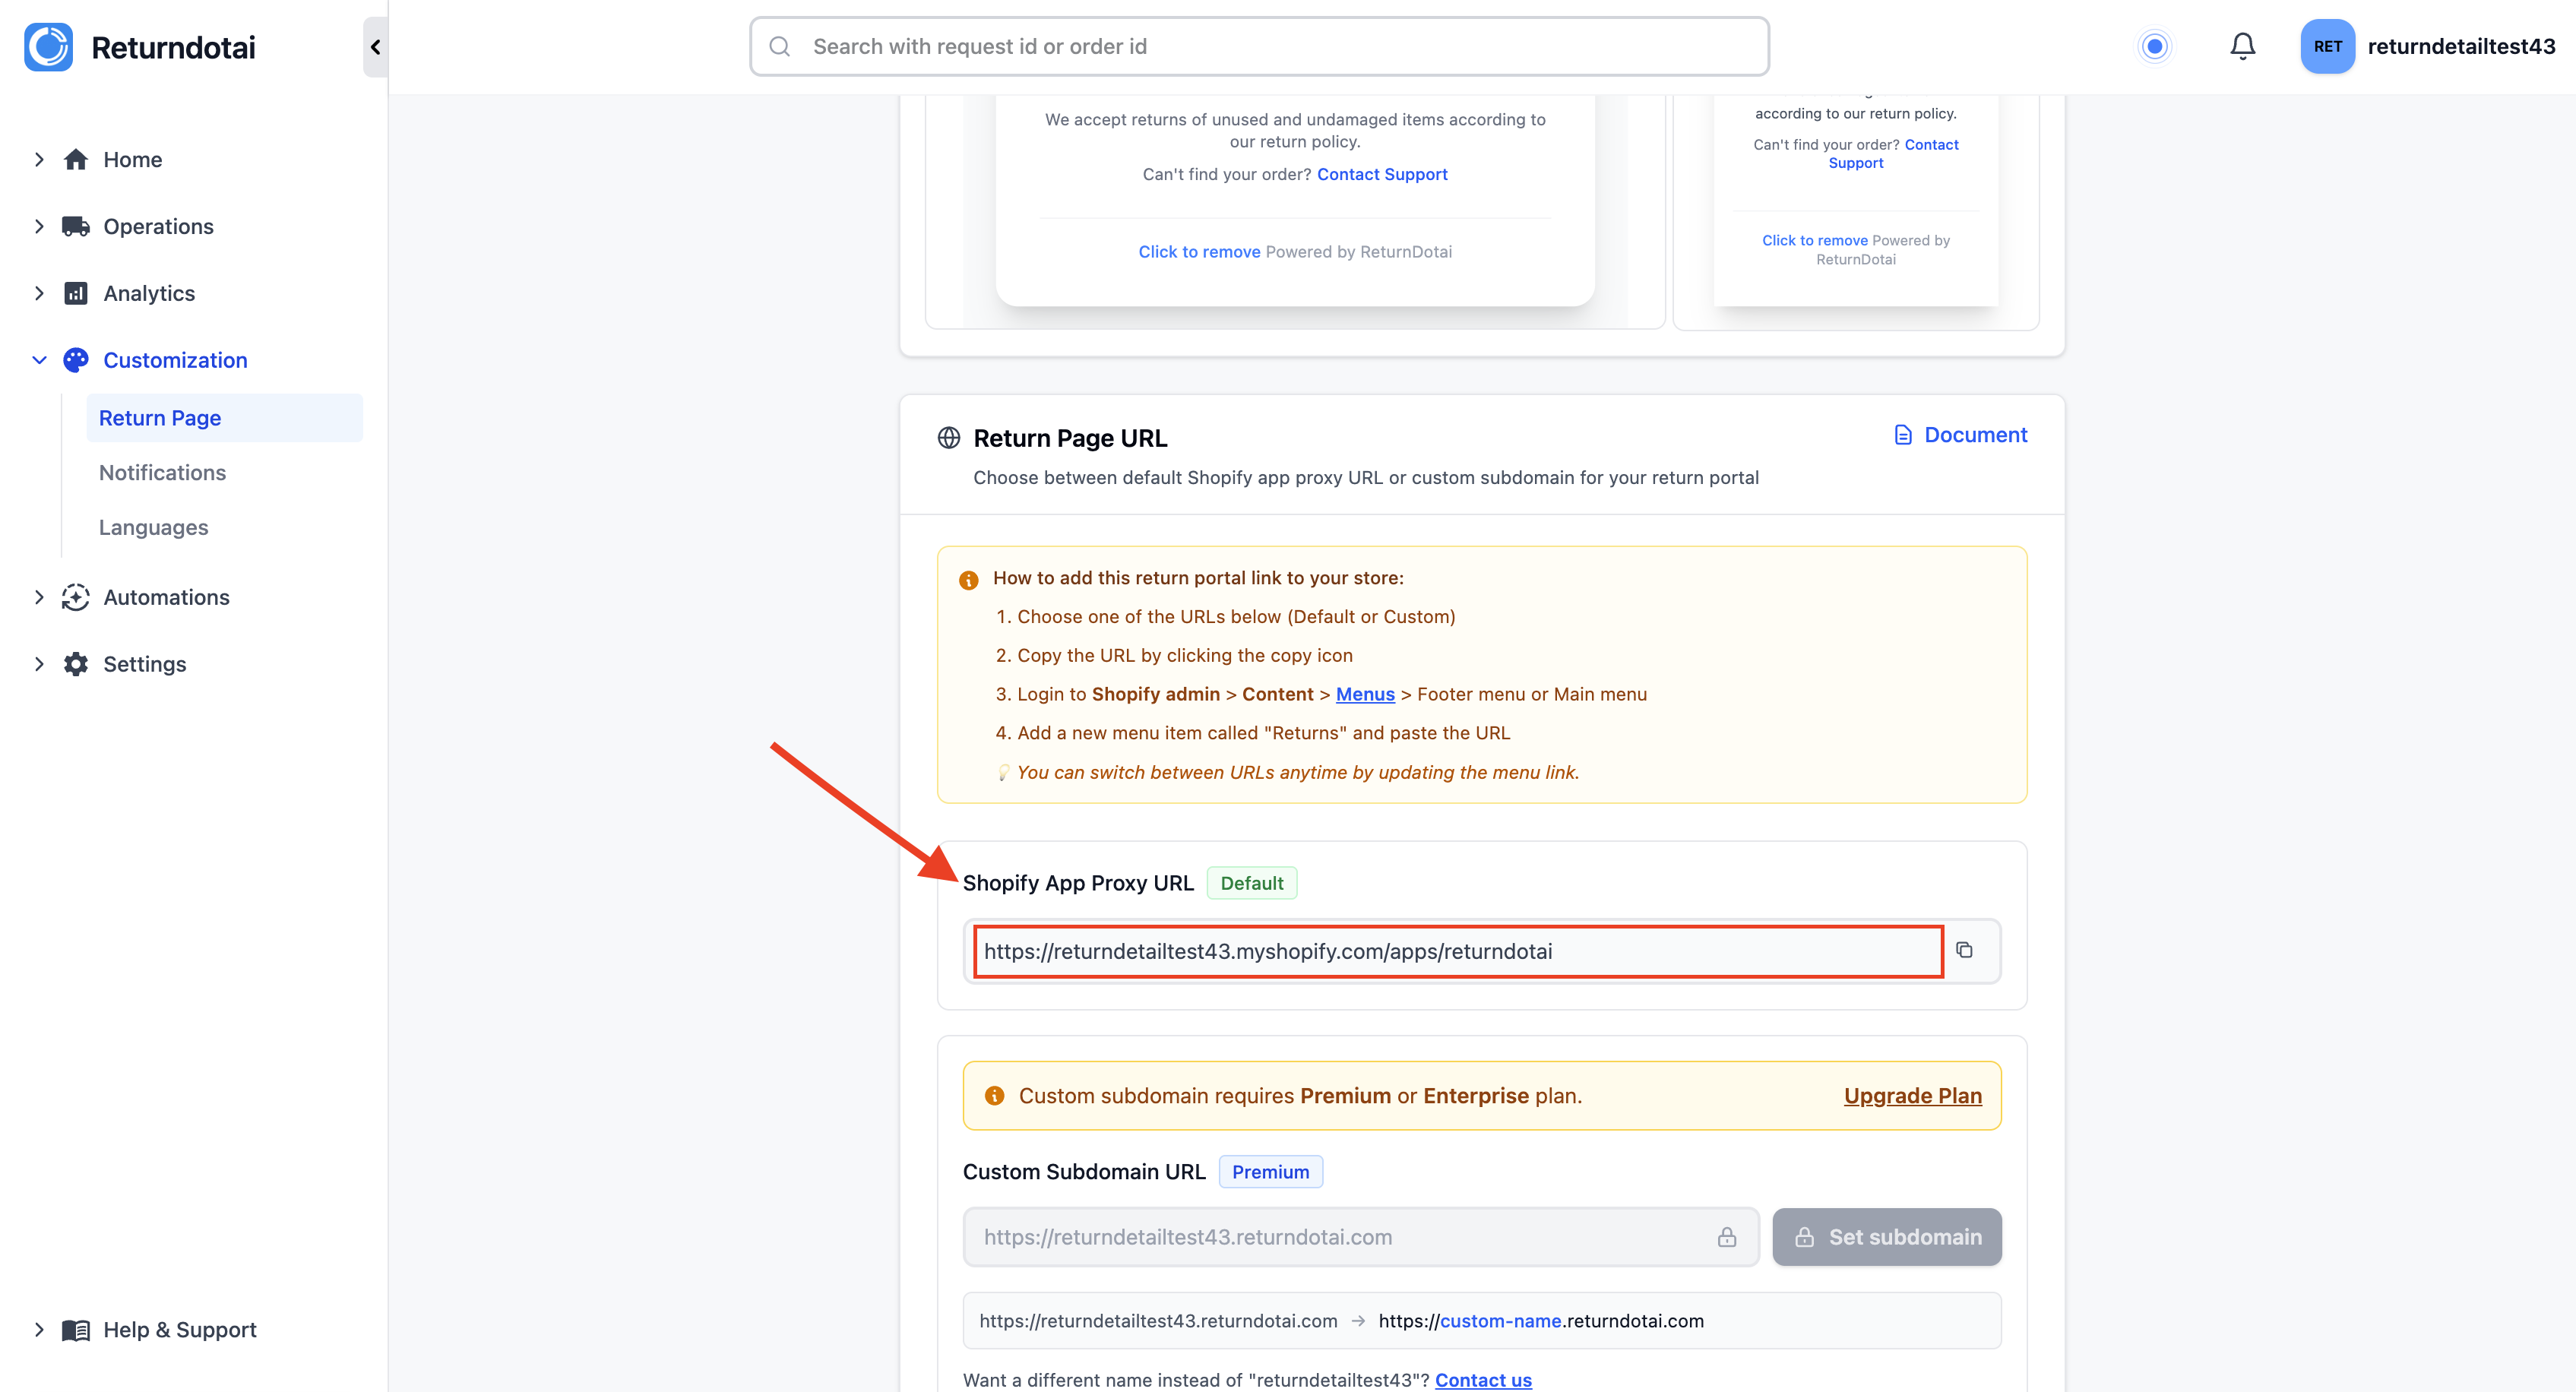
Step 1: Go to the Return App Proxy Section
Locate the Return App Proxy Section
Navigate to the settings area where you can manage your return portal URLs.
- 1Log into your Returndotai admin dashboard
- 2Navigate to Settings or Customization section
- 3Find the "Return App Proxy" section
- 4This section displays your current URL configurations
- 5You'll see both Primary and Secondary URL options
- 6Note the current URLs before making changes
Important: Primary vs Secondary URL
Understanding the difference between Primary and Secondary URLs is crucial before customizing.
- 1Review your current Primary URL setting
- 2Check if you have a Secondary URL configured
- 3Remember: Only Primary URL receives notifications
- 4Primary URL is used in:
- 5Email templates and notifications
- 6Return tracking links
- 7Customer communications
- 8Order status updates
- 9Plan which URL you want as Primary before customizing
Step 2: Customize URL
Begin URL Customization
Click the Customize URL button to start the process of updating your return portal URL.
- 1Locate the URL you want to customize (Primary or Secondary)
- 2Click the three-dot menu (⋮) next to the URL
- 3Select "Customize URL" from the menu
- 4The customization wizard will open
- 5Follow the 3 steps to update the URL on both Shopify and Returndotai
Follow the 3-Step Process
The customization process involves updating the URL in both Shopify and Returndotai to maintain consistency across both platforms.
- 1First: Edit the URL suffix in Shopify App Proxy settings
- 2Go to Shopify Admin > Apps > App and sales channel settings
- 3Find Returndotai Returns & Exchanges app
- 4Click "App proxy" or proxy settings
- 5Edit the "Subpath prefix" field
- 6Example: Change "returns-portal" to "returns" or "customer-returns"
- 7Second: Save your changes in Shopify
- 8Click "Save" in Shopify settings
- 9Note the exact URL suffix you entered
- 10Copy the URL suffix for the next step
- 11Third: Update the URL in Returndotai
- 12Return to Returndotai settings
- 13Paste the same URL suffix
- 14Ensure consistency between both platforms
- 15Save the changes
URL Suffix Guidelines and Best Practices
Choose a URL suffix that is memorable, SEO-friendly, and represents your return process clearly.
- Keep it simple and memorable: "returns", "return-center", "customer-returns"
- Use hyphens for multi-word suffixes: "easy-returns" not "easyreturns"
- Make it descriptive: Customers should understand where they're going
- Avoid special characters: Stick to letters, numbers, and hyphens
- Consider SEO: Include keywords like "returns" or "exchanges"
- Examples of good suffixes:
- /apps/returns
- /apps/return-portal
- /apps/easy-returns
- /apps/customer-service-returns
Remember to Save and Copy Your Edited URL Suffix
After editing the URL suffix in Shopify, it's crucial to save the changes and copy the exact suffix for use in Returndotai.
- 1In Shopify App Proxy settings:
- 2Click "Save" button
- 3Wait for confirmation message
- 4Copy the exact URL suffix you entered
- 5Important points:
- 6Copy the suffix exactly as entered (case-sensitive)
- 7Include any hyphens or special characters
- 8Do not include the "/apps/" part - only the suffix
- 9Example: If URL is "yourstore.com/apps/returns", copy only "returns"
- 10Keep the suffix ready for Step 3
Step 3: Go Back to the Return App and Update the URL Suffix Input Box
Navigate Back to Returndotai Settings
After saving your changes in Shopify, return to the Returndotai admin to complete the synchronization.
- 1Navigate back to Returndotai admin dashboard
- 2Go to the Return App Proxy section
- 3Locate the URL Suffix input box
- 4This is where you'll paste the suffix from Shopify
Update the Link in the Input Box
Paste the URL suffix from Shopify into the Returndotai settings to ensure both platforms are synchronized.
- 1Find the URL Suffix input box in Returndotai
- 2Clear any existing content
- 3Paste the exact URL suffix you copied from Shopify
- 4Double-check for accuracy:
- 5No extra spaces before or after
- 6Exact match to what you entered in Shopify
- 7Case-sensitive - match the capitalization
- 8Click "Save" to apply the changes
- 9Wait for success confirmation message
Keep Consistency Between Shopify and Returndotai
Maintaining consistency between both platforms is critical for the return portal to function correctly.
- 1Verify consistency checklist:
- 2✓ URL suffix matches exactly in both platforms
- 3✓ Capitalization is identical
- 4✓ No extra spaces or characters
- 5✓ Both platforms saved successfully
- 6Test the new URL:
- 7Open a new browser tab
- 8Visit: https://yourstore.com/apps/[your-suffix]
- 9Verify the return portal loads correctly
- 10Check that branding and styling appear correctly
- 11If the portal doesn't load:
- 12Clear browser cache and try again
- 13Wait 5-10 minutes for changes to propagate
- 14Double-check that both platforms have matching suffixes
- 15Contact support if issues persist
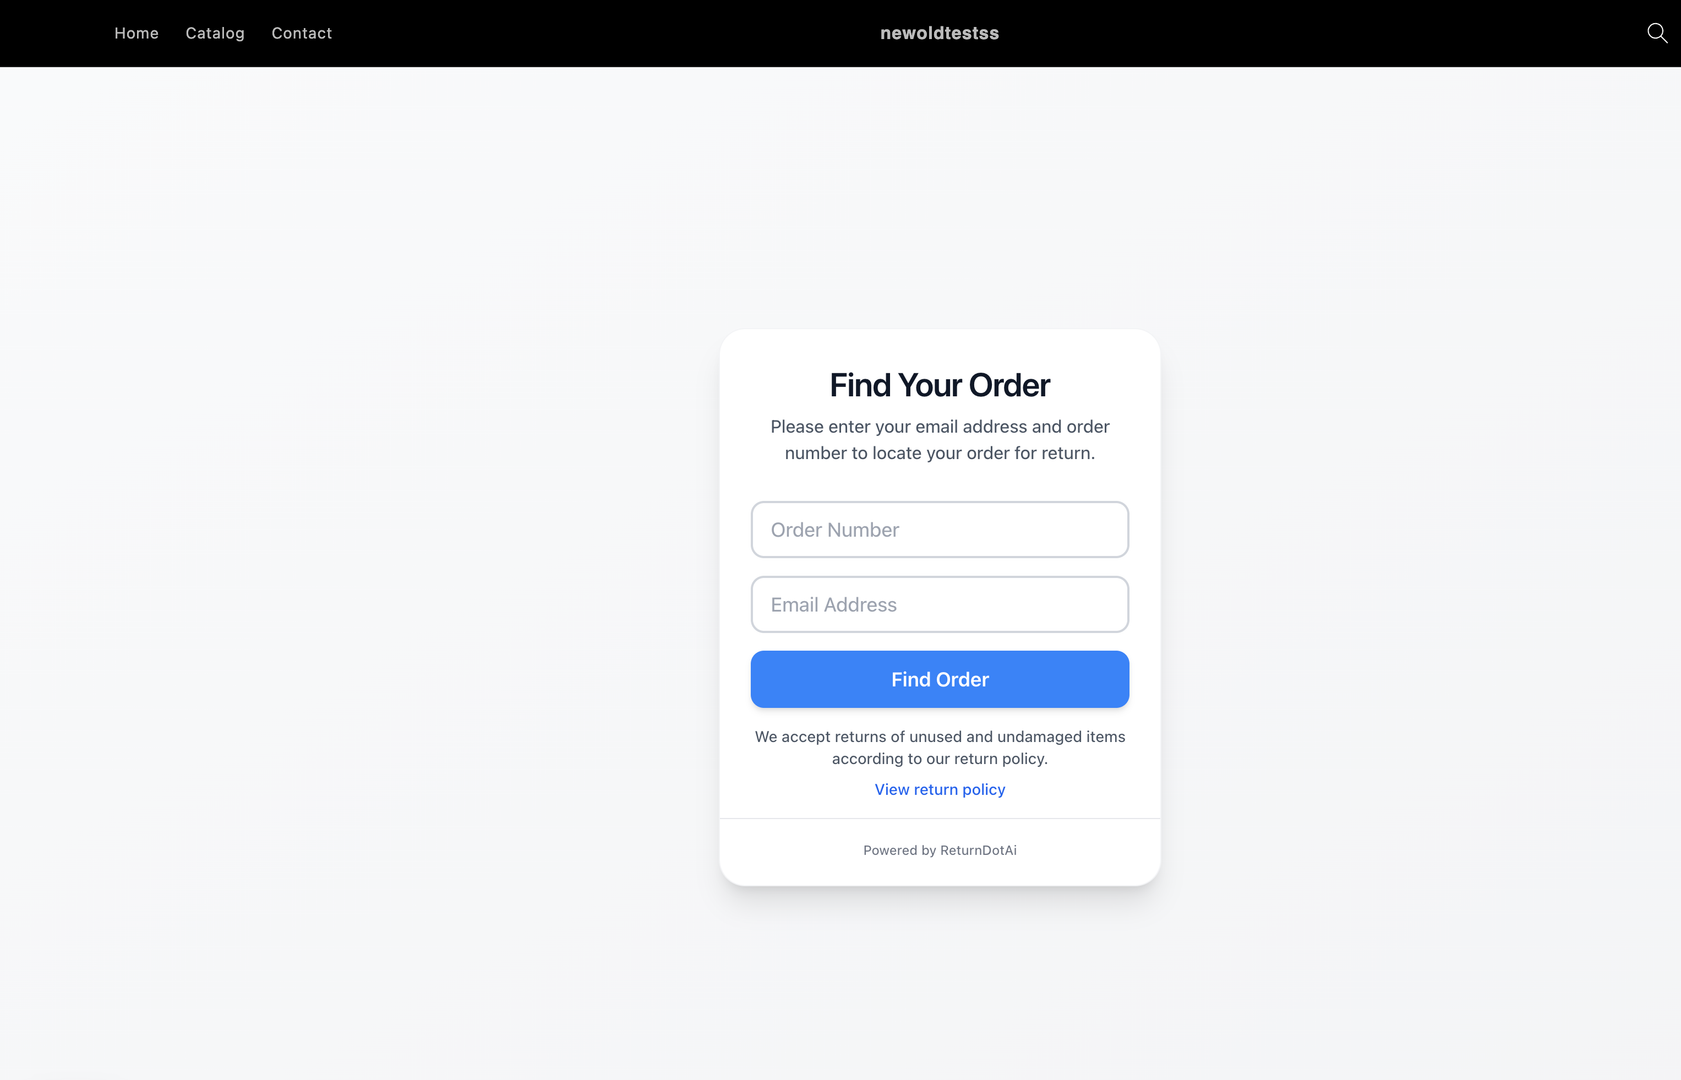
Testing and Verification
Test Your New Return Portal URL
After customizing the URL, thoroughly test the return portal to ensure everything works correctly.
- 1Open your new return portal URL in a browser:
- 2https://yourstore.com/apps/[your-custom-suffix]
- 3Verify the following elements:
- 4✓ Page loads without errors
- 5✓ Branding and logo appear correctly
- 6✓ Colors and styling match your store
- 7✓ Forms and input fields work
- 8✓ Navigation functions properly
- 9Test the return flow:
- 10Enter a test order number
- 11Walk through the return request process
- 12Verify all steps work as expected
- 13Check that you can select items and reasons
- 14Ensure the submission process completes
- 15Test on multiple devices:
- 16Desktop browser
- 17Mobile phone
- 18Tablet
- 19Different browsers (Chrome, Safari, Firefox)
Update Return Links Across Your Store
After changing the URL, update all references to the return portal throughout your store and communications.
- 1Update the following locations:
- 2Website/Store:
- 3Footer links
- 4Navigation menu items
- 5FAQ or Help pages
- 6Order confirmation pages
- 7Customer account pages
- 8Email Templates:
- 9Order confirmation emails
- 10Shipping confirmation emails
- 11Customer service email signatures
- 12Automated follow-up emails
- 13Marketing Materials:
- 14Return policy pages
- 15Customer service documentation
- 16Social media profiles
- 17Printed materials (if applicable)
- 18Note: Returndotai will automatically update the Primary URL in notification templates
Monitor Analytics and Customer Access
After the URL change, monitor your analytics to ensure customers are finding and using the new return portal URL.
- 1Check Google Analytics or your analytics tool:
- 2Monitor traffic to the new URL
- 3Check for 404 errors on old URL
- 4Verify conversion rates remain consistent
- 5Monitor customer support tickets:
- 6Watch for questions about finding the return portal
- 7Note any confusion about the URL change
- 8Address common questions proactively
- 9Review return submission rates:
- 10Compare submission rates before and after
- 11Investigate any significant drops
- 12Ensure customers can access the portal easily
Bonus Support
Free Visual and Layout Assistance
If you experience any visual or layout issues after updating the URL, our support team provides free assistance for basic interface fixes to ensure your Returns Portal matches your store's look and feel.
- 1Common issues we can help with:
- 2Logo not displaying correctly
- 3Colors not matching your store theme
- 4Layout misalignment or spacing issues
- 5Font inconsistencies
- 6Mobile responsiveness problems
- 7Button styling adjustments
- 8How to request support:
- 9Take screenshots of any visual issues
- 10Note your store URL and new return portal URL
- 11Describe the specific problem
- 12Contact support via email or chat
- 13Include browser and device information
- 14Support team will:
- 15Review your return portal styling
- 16Make basic adjustments to match your store
- 17Ensure consistent branding
- 18Test on multiple devices
- 19Verify fixes resolve the issues
Advanced Customization Options
Beyond basic fixes, Returndotai offers advanced customization options to fully match your brand identity.
- Available customization options:
- Custom CSS for complete style control
- Logo and brand image placement
- Color scheme matching
- Custom fonts and typography
- Layout modifications
- Custom messaging and copy
- Premium customization services:
- Complete portal redesign
- Custom return flow logic
- Integration with other apps
- Multi-language support
- Advanced analytics tracking
- Contact our team to discuss advanced customization needs
Troubleshooting
Common Issues and Solutions
Common troubleshooting solutions for return portal URL customization issues:
- Return portal not loading at new URL:
- Wait 5-10 minutes for changes to propagate
- Clear browser cache and cookies
- Verify URL suffix matches exactly in both platforms
- Check Shopify App Proxy status is enabled
- 404 Error when accessing portal:
- Confirm app proxy is enabled in Shopify
- Check that the suffix was saved in both platforms
- Verify no typos in the URL suffix
- Ensure the app is installed and active
- Styling or branding issues:
- Clear browser cache
- Check if custom CSS was lost during update
- Request support for visual fixes (free)
- Verify logo images are accessible
- Email links still use old URL:
- Verify Primary URL is set correctly
- Check notification template settings
- Contact support to refresh email templates
- Customers reporting broken links:
- Update all website and email references
- Set up redirect from old URL (if possible)
- Communicate URL change to customers
- Add prominent notice on website
How to Revert to Previous URL
If you encounter issues and need to revert to the previous URL, follow the same process in reverse.
- 1First: Restore original URL suffix in Shopify
- 2Go to Shopify App Proxy settings
- 3Enter the original URL suffix
- 4Save the changes
- 5Second: Update Returndotai with original suffix
- 6Return to Returndotai settings
- 7Enter the original URL suffix
- 8Save the changes
- 9Third: Verify old URL works
- 10Test the original URL
- 11Confirm portal loads correctly
- 12Check that all features work
- 13Contact support if you need assistance reverting changes
When to Contact Support
Reach out to the Returndotai support team if you encounter any of these situations.
- 1Contact support immediately if:
- 2Return portal is completely inaccessible
- 3Changes don't take effect after 30 minutes
- 4You see error messages you can't resolve
- 5Customer submissions are failing
- 6Email notifications stop working
- 7Contact support for assistance with:
- 8Visual or layout fixes (free)
- 9Advanced customization needs
- 10URL redirect setup
- 11Multiple URL configuration
- 12Custom domain setup
- 13Information to include when contacting support:
- 14Your store URL
- 15New return portal URL you're trying to set up
- 16Screenshots of any error messages
- 17Steps you've already tried
- 18Browser and device information
Best Practices
Choosing the Right URL Suffix
Key points to understand:
- Keep it short and memorable: Easier for customers to type or remember
- Make it descriptive: Should clearly indicate it's for returns/exchanges
- Use common terms: "returns", "return-center", "exchanges"
- Consider SEO: Include keywords customers might search for
- Avoid confusion: Don't use terms that conflict with other pages
- Think long-term: Choose a URL you won't need to change frequently
- Test pronunciation: Make sure it sounds clear when said aloud
Communicating URL Changes to Customers
Best practices for communicating URL changes to your customers:
- Announce the change proactively:
- Send email to active customers
- Post on social media
- Add banner to website temporarily
- Update FAQ and help sections
- Provide clear instructions:
- Show old URL and new URL side-by-side
- Explain benefits of the new URL
- Reassure customers about security and privacy
- Consider a transition period:
- Keep old URL accessible if possible
- Set up redirects when feasible
- Monitor for customer confusion
- Be ready to assist customers who use old bookmarks
Keep Documentation Updated
Keep all documentation and references up-to-date after changing your return portal URL:
- Update all customer-facing documentation:
- Return policy pages
- Help center articles
- FAQ sections
- Video tutorials
- Customer service scripts
- Update internal documentation:
- Staff training materials
- Customer service playbooks
- Email signature templates
- Quick reference guides
- Create bookmarks and shortcuts:
- Add to customer service browser bookmarks
- Create quick links in internal tools
- Update any automated systems
Key Features
Domain Integration
Return portal runs directly on your store domain for better trust and SEO
Custom URL Suffix
Choose a memorable, branded URL suffix that fits your store
Primary URL Control
Designate your preferred URL for all customer notifications and tracking
Shopify App Proxy
Seamless integration using Shopify's built-in app proxy technology
Free Visual Support
Our team provides complimentary assistance for basic interface fixes
Easy Customization
Simple 3-step process to update URLs in both Shopify and Returndotai
Important Notes
Consistency is Critical
The URL suffix must match exactly in both Shopify App Proxy settings and Returndotai settings. Any mismatch will prevent the return portal from loading correctly.
Only Primary URL Receives Notifications
Email notifications and return tracking status will only be sent to the Primary return page URL. Make sure you set the correct URL as Primary.
Test Before Announcing
After customizing the URL, thoroughly test the return portal on multiple devices and browsers before announcing the change to customers.
Update All References
After changing the URL, update all references throughout your store, emails, and marketing materials to ensure customers use the new URL.
Free Visual Fixes Available
If you experience any visual or layout issues after the URL update, contact support for free assistance with basic interface fixes.
Choose SEO-Friendly URL
Select a URL suffix that includes keywords like "returns" or "exchanges" for better search engine optimization and customer clarity.
Related Articles
Comment Block in Timeline
Add comments, notes, and documentation directly to return request timelines
Auto-sync with brand color
Automatically synchronize your store theme colors with the return portal
Support A Record (White-label domain)
Configure custom domains for your return portal using A record DNS settings
Embed return portal to the store page
Seamlessly integrate the return portal directly into your store pages