Introduction
Create and manage custom return reasons to understand why customers return orders. Easily configure reason names, sub-reasons, and require comments or images for better insights.
Access this feature
Navigate to /settings/reasons in your application.
Why use Return reason?
Benefits of Return Reasons
Return reasons help you understand customer behavior and improve your products.
- Easily create reasons to return orders for your customers
- Require information (comments, videos/images) to know why orders are returned
- Analyze return patterns to identify product issues
- Make data-driven decisions to reduce future returns
- Provide structured return process for customers
Step by step to create return reasons list
Step 1: Navigate to Return Reasons
Access the return reasons configuration page.
- 1On Returndotai left navigation bar, click Settings > Return reasons
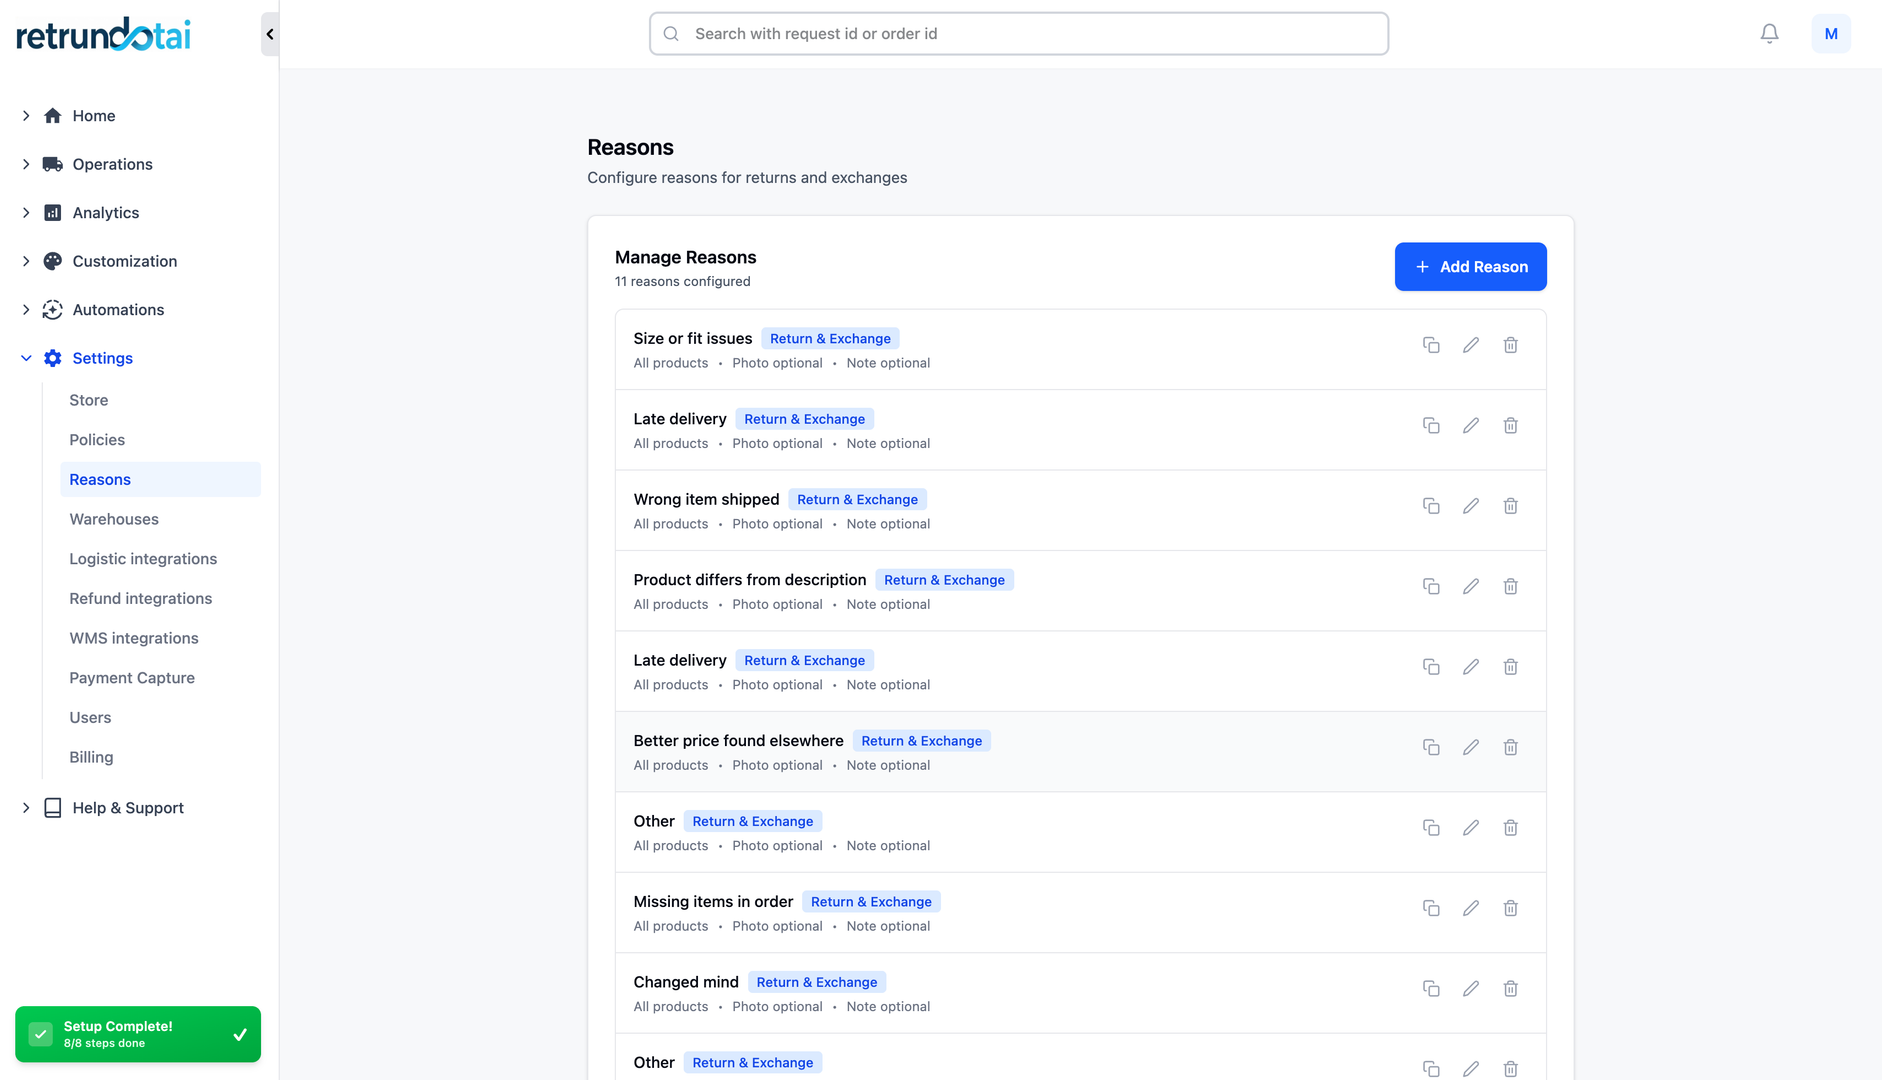
Step 2: Review Default Reasons
We have some default reasons for you. To edit or delete the unnecessary reasons, you can manage them from the list.
- 1Review the pre-configured default reasons
- 2Click on any reason to edit its details
- 3Use the delete option to remove unnecessary reasons

Step 3: Add New Reason
Create custom return reasons tailored to your business needs.
- 1To make other reasons on your return reasons list, select "Add reason"
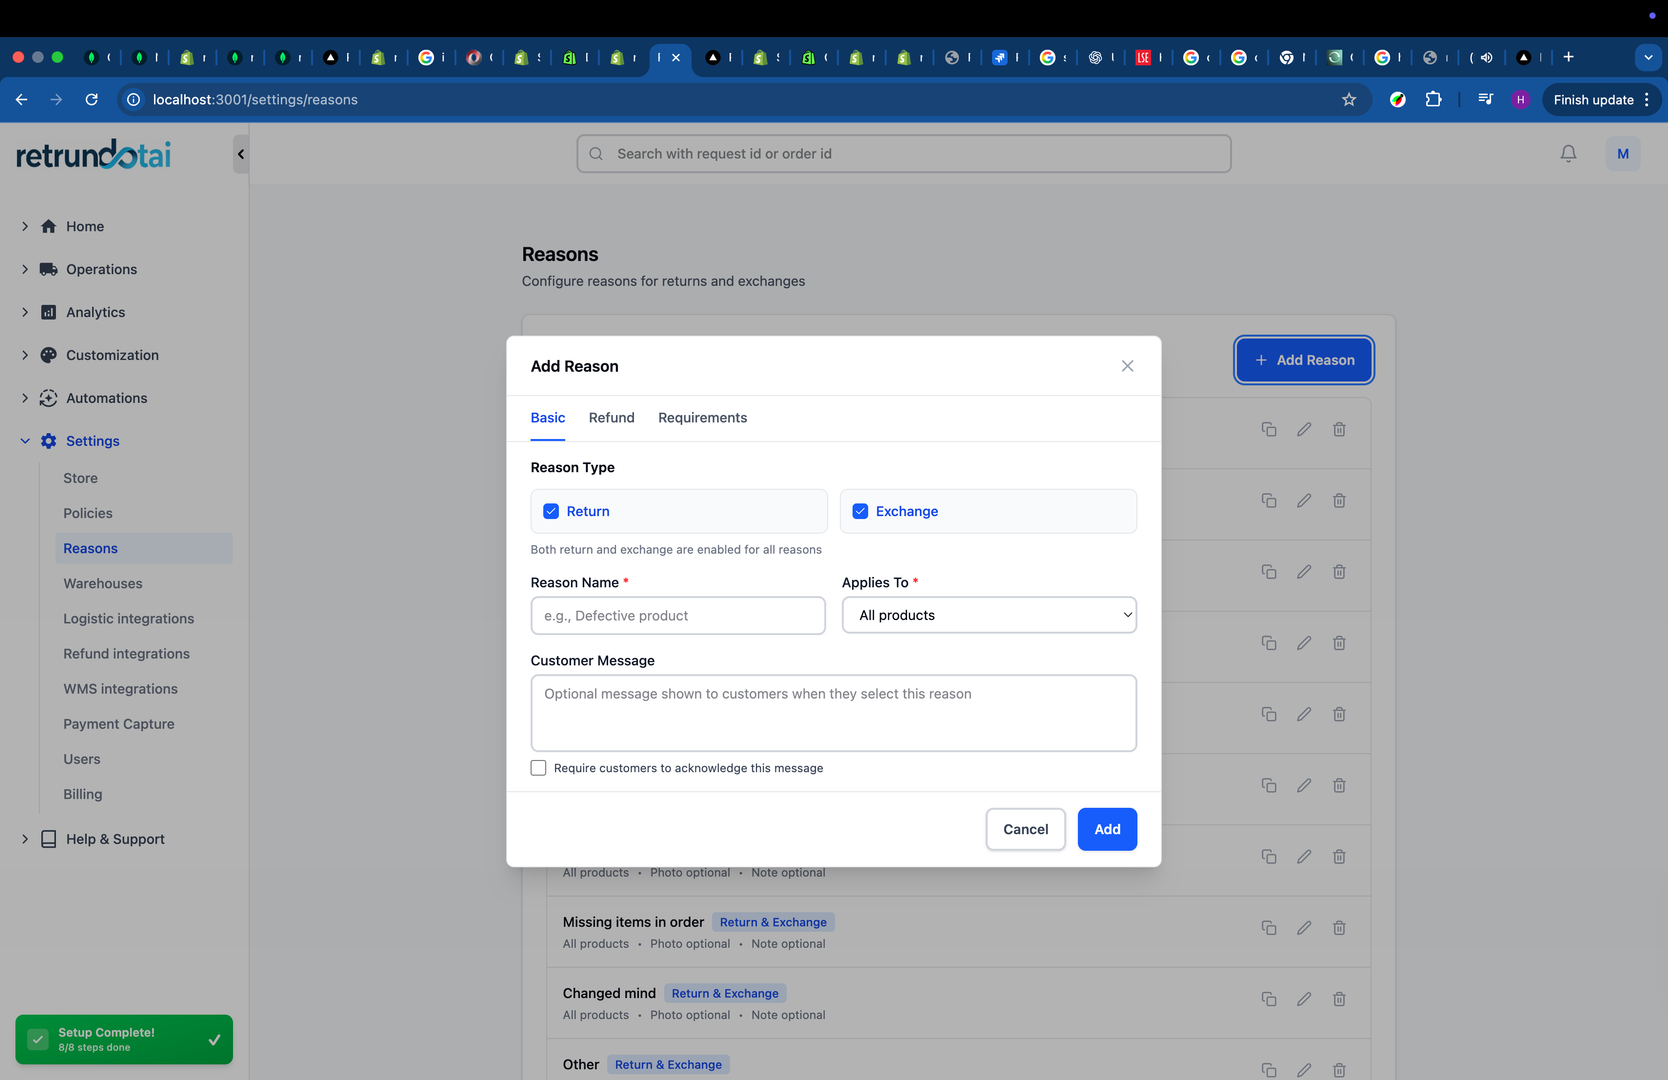
Step 4: Configure Reason Details
Set up the reason name, sub-reasons, and required fields.
- 1Type the "Reason name" (e.g., "Wrong size", "Damaged item", "Not as described")
- 2You can add "Sub-reason" names optionally for more specific categorization
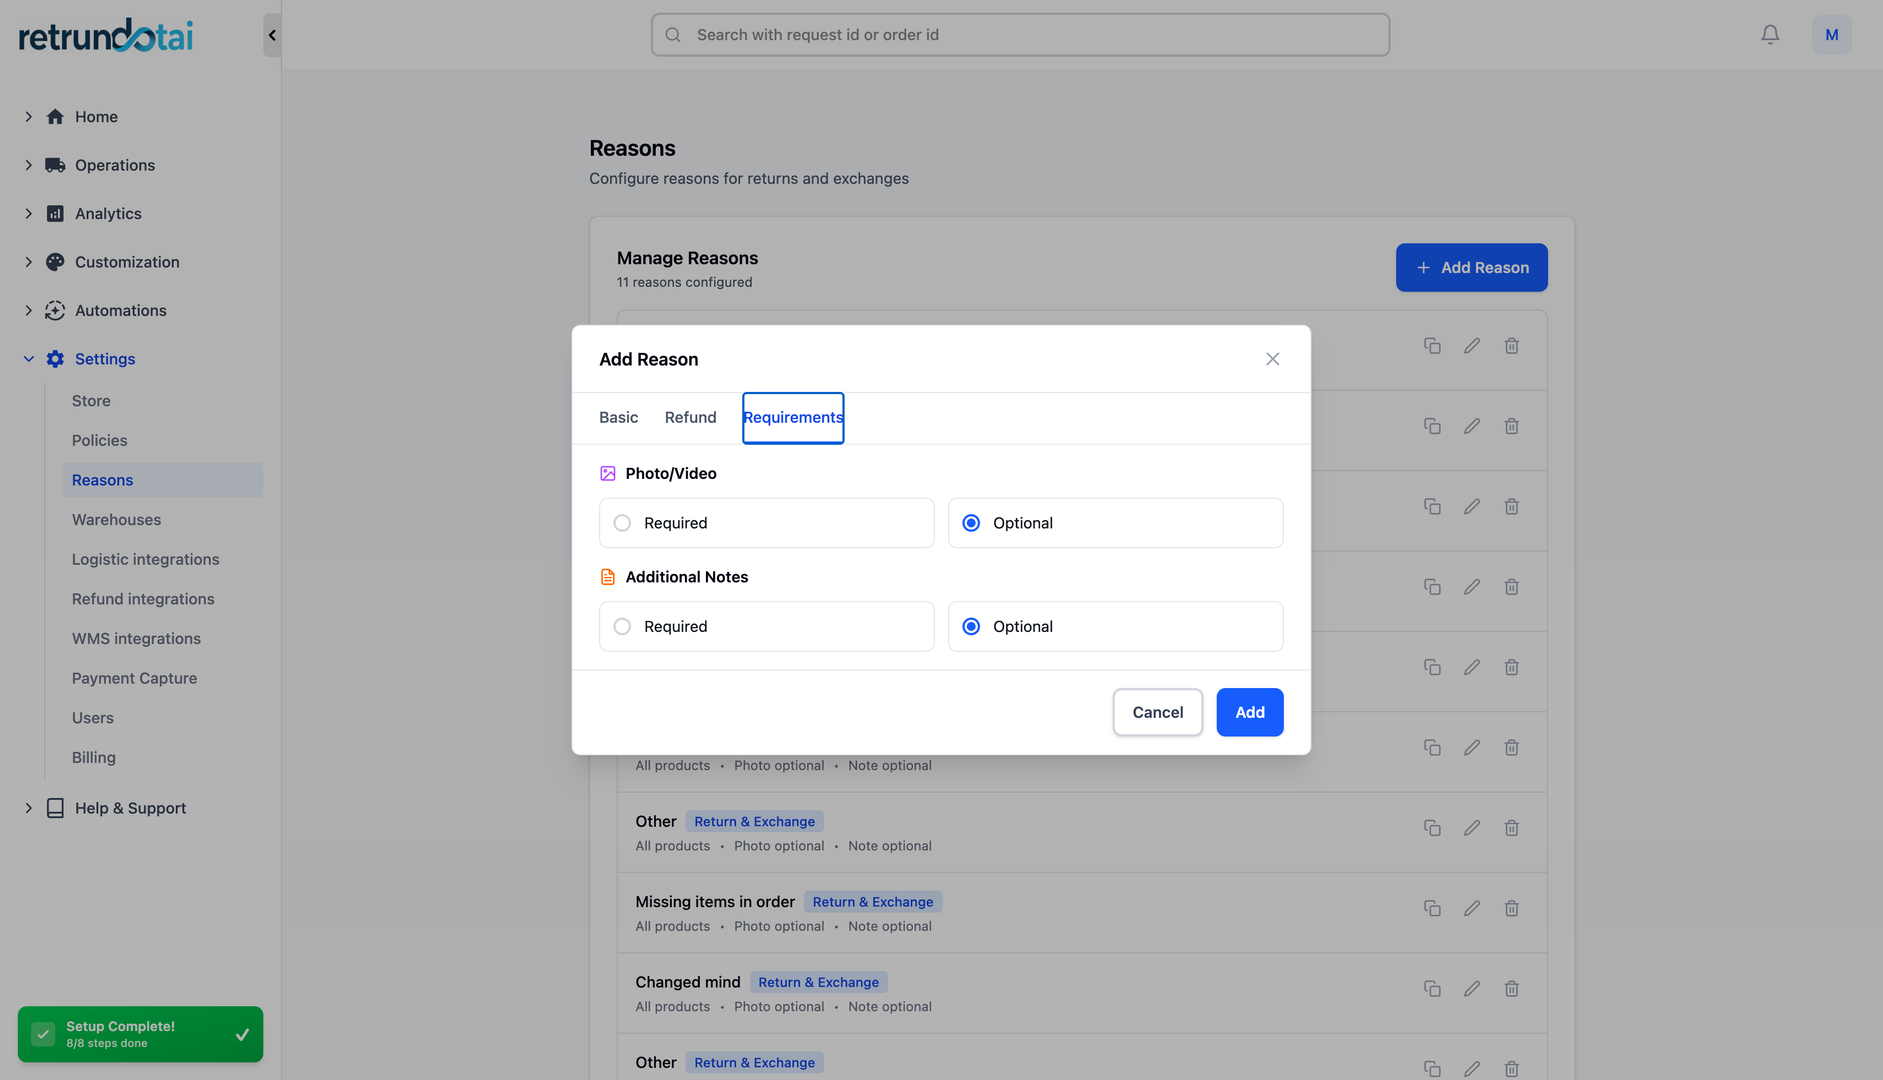
- 3Active comments and image fields on your returns page or not
- 4In each field, click "Require" or "Optional" whether or not you want the fields mandatory filled by customers
- Reason Name: The main return reason displayed to customers
- Sub-reasons (optional): More specific reasons under the main category
- Comments field: Allow customers to provide additional details
- Require: Customer must provide comments
- Optional: Customer can choose to add comments
- Image/Video field: Allow customers to upload evidence
- Require: Customer must upload images/videos
- Optional: Customer can choose to upload media
Step 5: Save the Reason
Finalize and activate your return reason.
- 1Choose "Save" and reasons are created successfully
Customer Experience
How Customers See Return Reasons
While returning orders, your customers will see the full list of your return reasons.
- Customers select from the return reasons you configured
- With each reason, they will see the field to add comments and images describing why the orders must be returned
- Required fields are marked and must be completed before submission
- Optional fields give customers flexibility to provide additional information
Best Practices
Setting Up Effective Return Reasons
Keep reason names clear and concise
- Create 5-10 main reasons to cover common return scenarios
- Use sub-reasons to get more specific feedback without overwhelming customers
- Require images for reasons like "Damaged item" or "Wrong item received"
- Make comments optional for most reasons to avoid friction
- Regularly review reasons and update based on customer feedback
Common Return Reasons to Include
Wrong size or fit
- Changed my mind
- Item damaged or defective
- Wrong item received
- Not as described
- Better price elsewhere
- Late delivery
- Quality not as expected
When to Require Comments or Images
Key points to understand:
- Require images for:
- Damaged or defective items (for verification)
- Wrong item received (to identify the error)
- Quality issues (to understand the problem)
- Require comments for:
- "Other" or "Not as described" reasons (for clarity)
- Any reason where you need specific details
- Keep optional for:
- "Changed my mind" (customer preference)
- "Wrong size" (self-explanatory)
- "Better price elsewhere" (no additional info needed)
Managing Return Reasons
Editing Existing Reasons
You can update return reasons at any time.
- 1Go to Settings > Return reasons
- 2Click on the reason you want to edit
- 3Update the reason name, sub-reasons, or field requirements
- 4Click "Save" to apply changes
Deleting Reasons
Remove reasons that are no longer relevant.
- 1Go to Settings > Return reasons
- 2Find the reason you want to remove
- 3Click the delete icon or option
- 4Confirm deletion
Analyzing Return Reasons
Use return reason data to improve your business:
- Track which reasons are most common
- Identify patterns in product quality issues
- Spot sizing or description problems
- Review customer comments for actionable insights
- Use data to reduce future returns
- Improve product descriptions based on "Not as described" feedback
Key Features
Custom Return Reasons
Create unlimited custom reasons tailored to your business needs
Sub-reasons Support
Add optional sub-categories for more detailed return tracking
Required Fields
Make comments or images required or optional for each reason
Default Reasons
Pre-configured common reasons to get started quickly
Image/Video Upload
Allow customers to upload photos or videos as evidence
Easy Management
Edit or delete reasons anytime from the settings page
Important Notes
Start with Defaults
Review and customize the default reasons before creating new ones. This saves time and ensures common scenarios are covered.
Require Images for Quality Issues
For reasons like "Damaged" or "Defective", always require images. This helps verify claims and improve quality control.
Don't Overwhelm Customers
Limit main reasons to 5-10 options. Too many choices can cause decision fatigue and slow down the return process.
Use Sub-reasons Wisely
Sub-reasons help you get detailed data without cluttering the main reason list. Use them for common reasons that need clarification.
Make Comments Optional by Default
Only require comments when absolutely necessary. Optional comments reduce friction while still gathering useful feedback.
Review and Update Regularly
Analyze which reasons are used most frequently and update your list quarterly to stay relevant.
Test the Customer Experience
After setting up reasons, go through the return process as a customer to ensure it's smooth and intuitive.
Related Articles
Comment Block in Timeline
Add comments, notes, and documentation directly to return request timelines
How to Customize Return Page URL by Shopify App Proxy
Set up custom URLs for your return portal using Shopify app proxy integration
Auto-sync with brand color
Automatically synchronize your store theme colors with the return portal
Support A Record (White-label domain)
Configure custom domains for your return portal using A record DNS settings